Get Started Web3 Maker®
With this, anyone can easily start mining with Web3Maker. From purchasing a machine, to running it, to receiving rewards, to converting to yen or other coins, everything can be completed smoothly on our site.

Step1.One-Click Login
To log in to our service site, simply select your account. You do not need to fill in any user information, and your account will be automatically created.
Click the Login buttonClick "LOG IN" in the upper right corner of the screen.
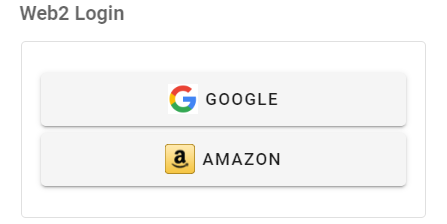
Select your login accountYou can log in easily via Web2 login with your existing Google or Amazon account. Logging in with a Google account is most common and makes account creation even simpler.
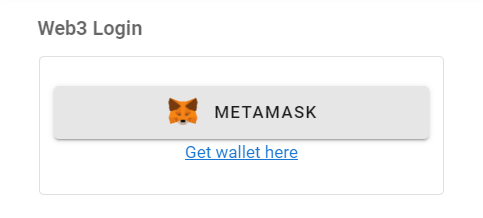
If you have a MetaMask account, Web3 login is smoother.
You can create a MetaMask account here. See the "Extra Edition: Creating a Wallet" section for the creation procedure.
Step2.How to Purchase Web3 Maker®
We will walk you through the process of purchasing Web3 Maker, along with the easiest way to start mining and our recommended selections.
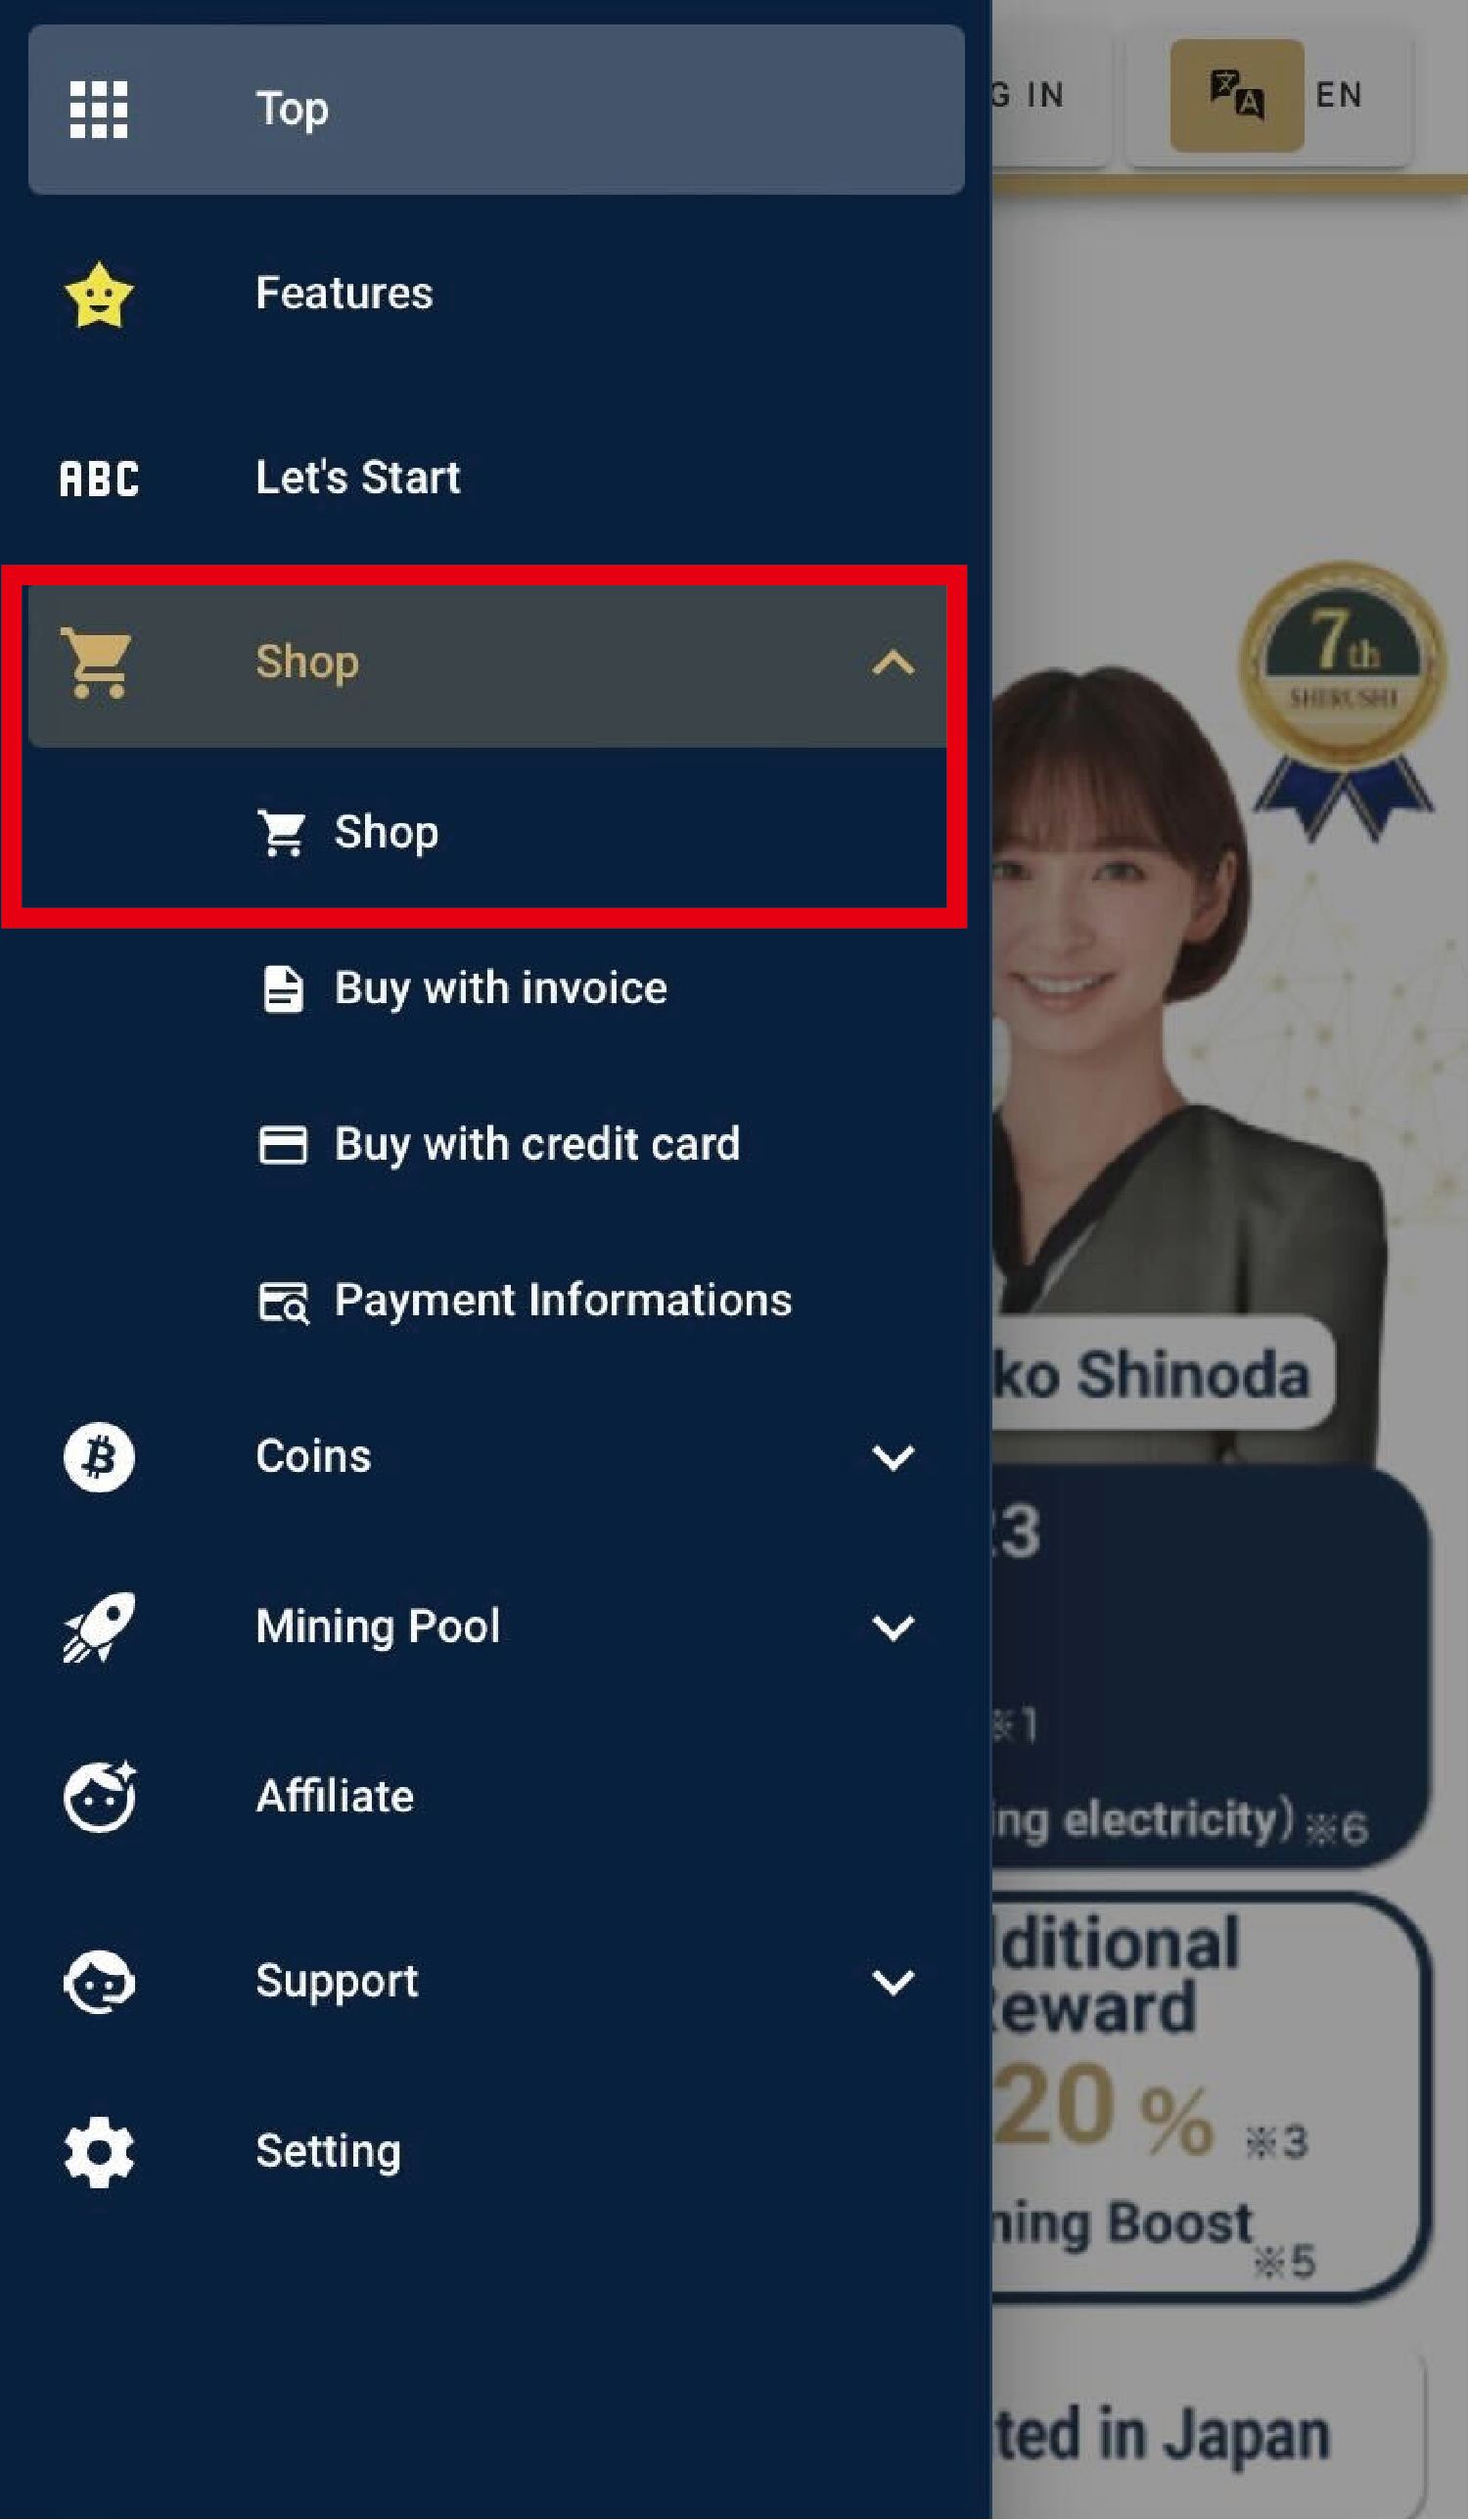
Purchase InstructionsPlease select "Shop > Shop" from the menu bar on the left side of the screen.
You must log in before purchasing. Please log in before proceeding.
Please enter the number of units you wish to purchase.

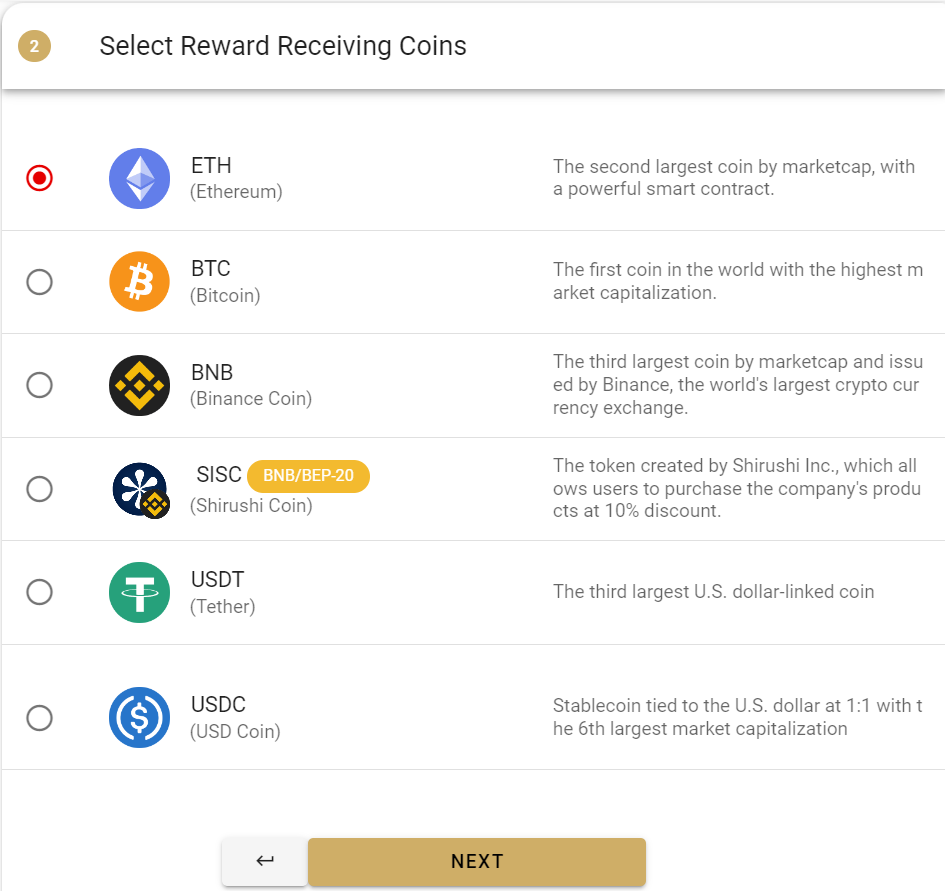
Please select the type of coin you wish to receive as your mining reward. ETH is the most popular reward-receiving coin. The coin type can be changed after mining begins.
Data Center Maintenance is a service where your machine is kept at our data center. The service includes free replacement and repair, along with a three-year uptime warranty. If you choose Data Center Maintenance, you can start mining in as little as 2 days after purchase.

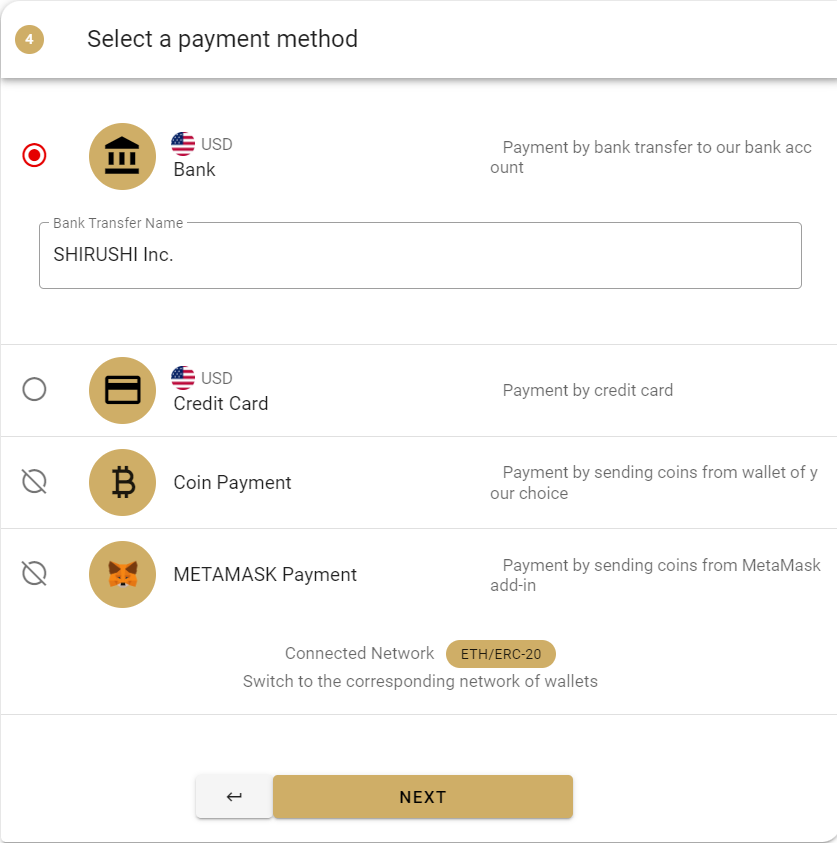
Please select a payment method for your purchase. We recommend bank transfer for first-time customers because it is simple and straightforward.
After you agree to the contract documents and confirm your order details, the purchase completion screen will appear.
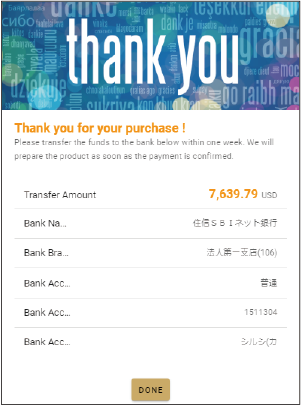
If you have chosen to pay by bank transfer, please transfer the funds to the bank account shown on this screen.
Step3.About Wi-Fi Settings
We will explain how to set up the Wi-Fi settings required to run Web3 Maker at home.
If you have chosen the data center deposit option in "Step 2. How to Purchase Web3 Maker®", you do not need to set up Wi-Fi. Please proceed to "Step 4: Check Performance".
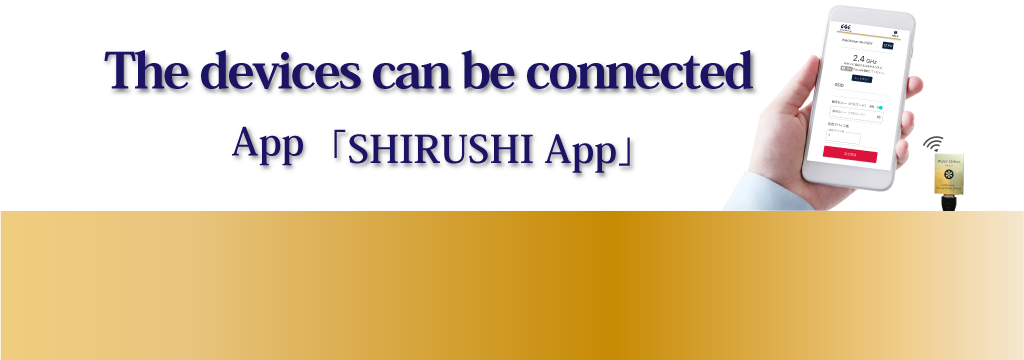
Install SHIRUSHI AppPlease follow the steps below to install our SHIRUSHI App.
- Search for "SHIRUSHI App" in the App Store or Google Play Store and install it.
- Launch the installed SHIRUSHI App.
- When the app is launched, set location access to "Only while using the app".


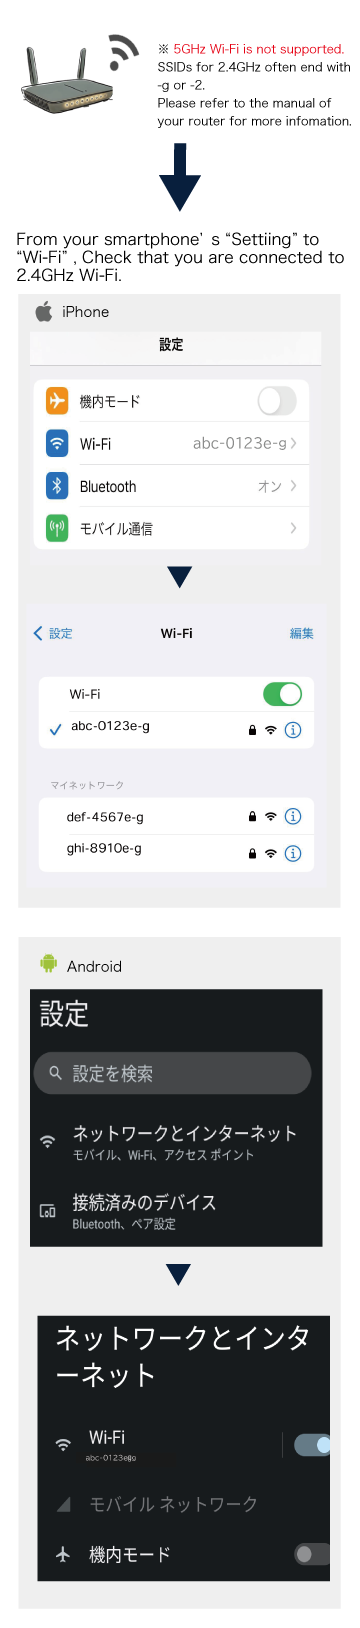
Connect your smartphone to the wireless LAN router's Primary SSID (2.4GHz) abc-0123e-g.
Launch the SHIRUSHI App on your smartphone and follow the steps below.
Step 1: Connect Web3 Maker and your smartphone with a USB Type-C cable.
Step 2: Confirm that the side LED is lit red.
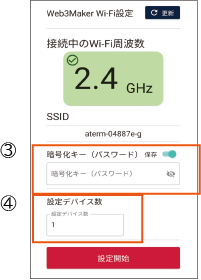
Step 3: Enter the Wi-Fi password.
Step 4: Enter the number of Web3 Maker units to be connected.
Step 5: The Wi-Fi connection is complete when the side LED blinks blue twice.
Once the Wi-Fi connection is successfully completed, please log in to our service site.
From the menu bar, check "Mining > Worker Status (Workers)".
Confirm that the status is set to "Active".

Step4.Check Performance
Once you have started mining with Web3 Maker, you can check your daily rewards on the service site.
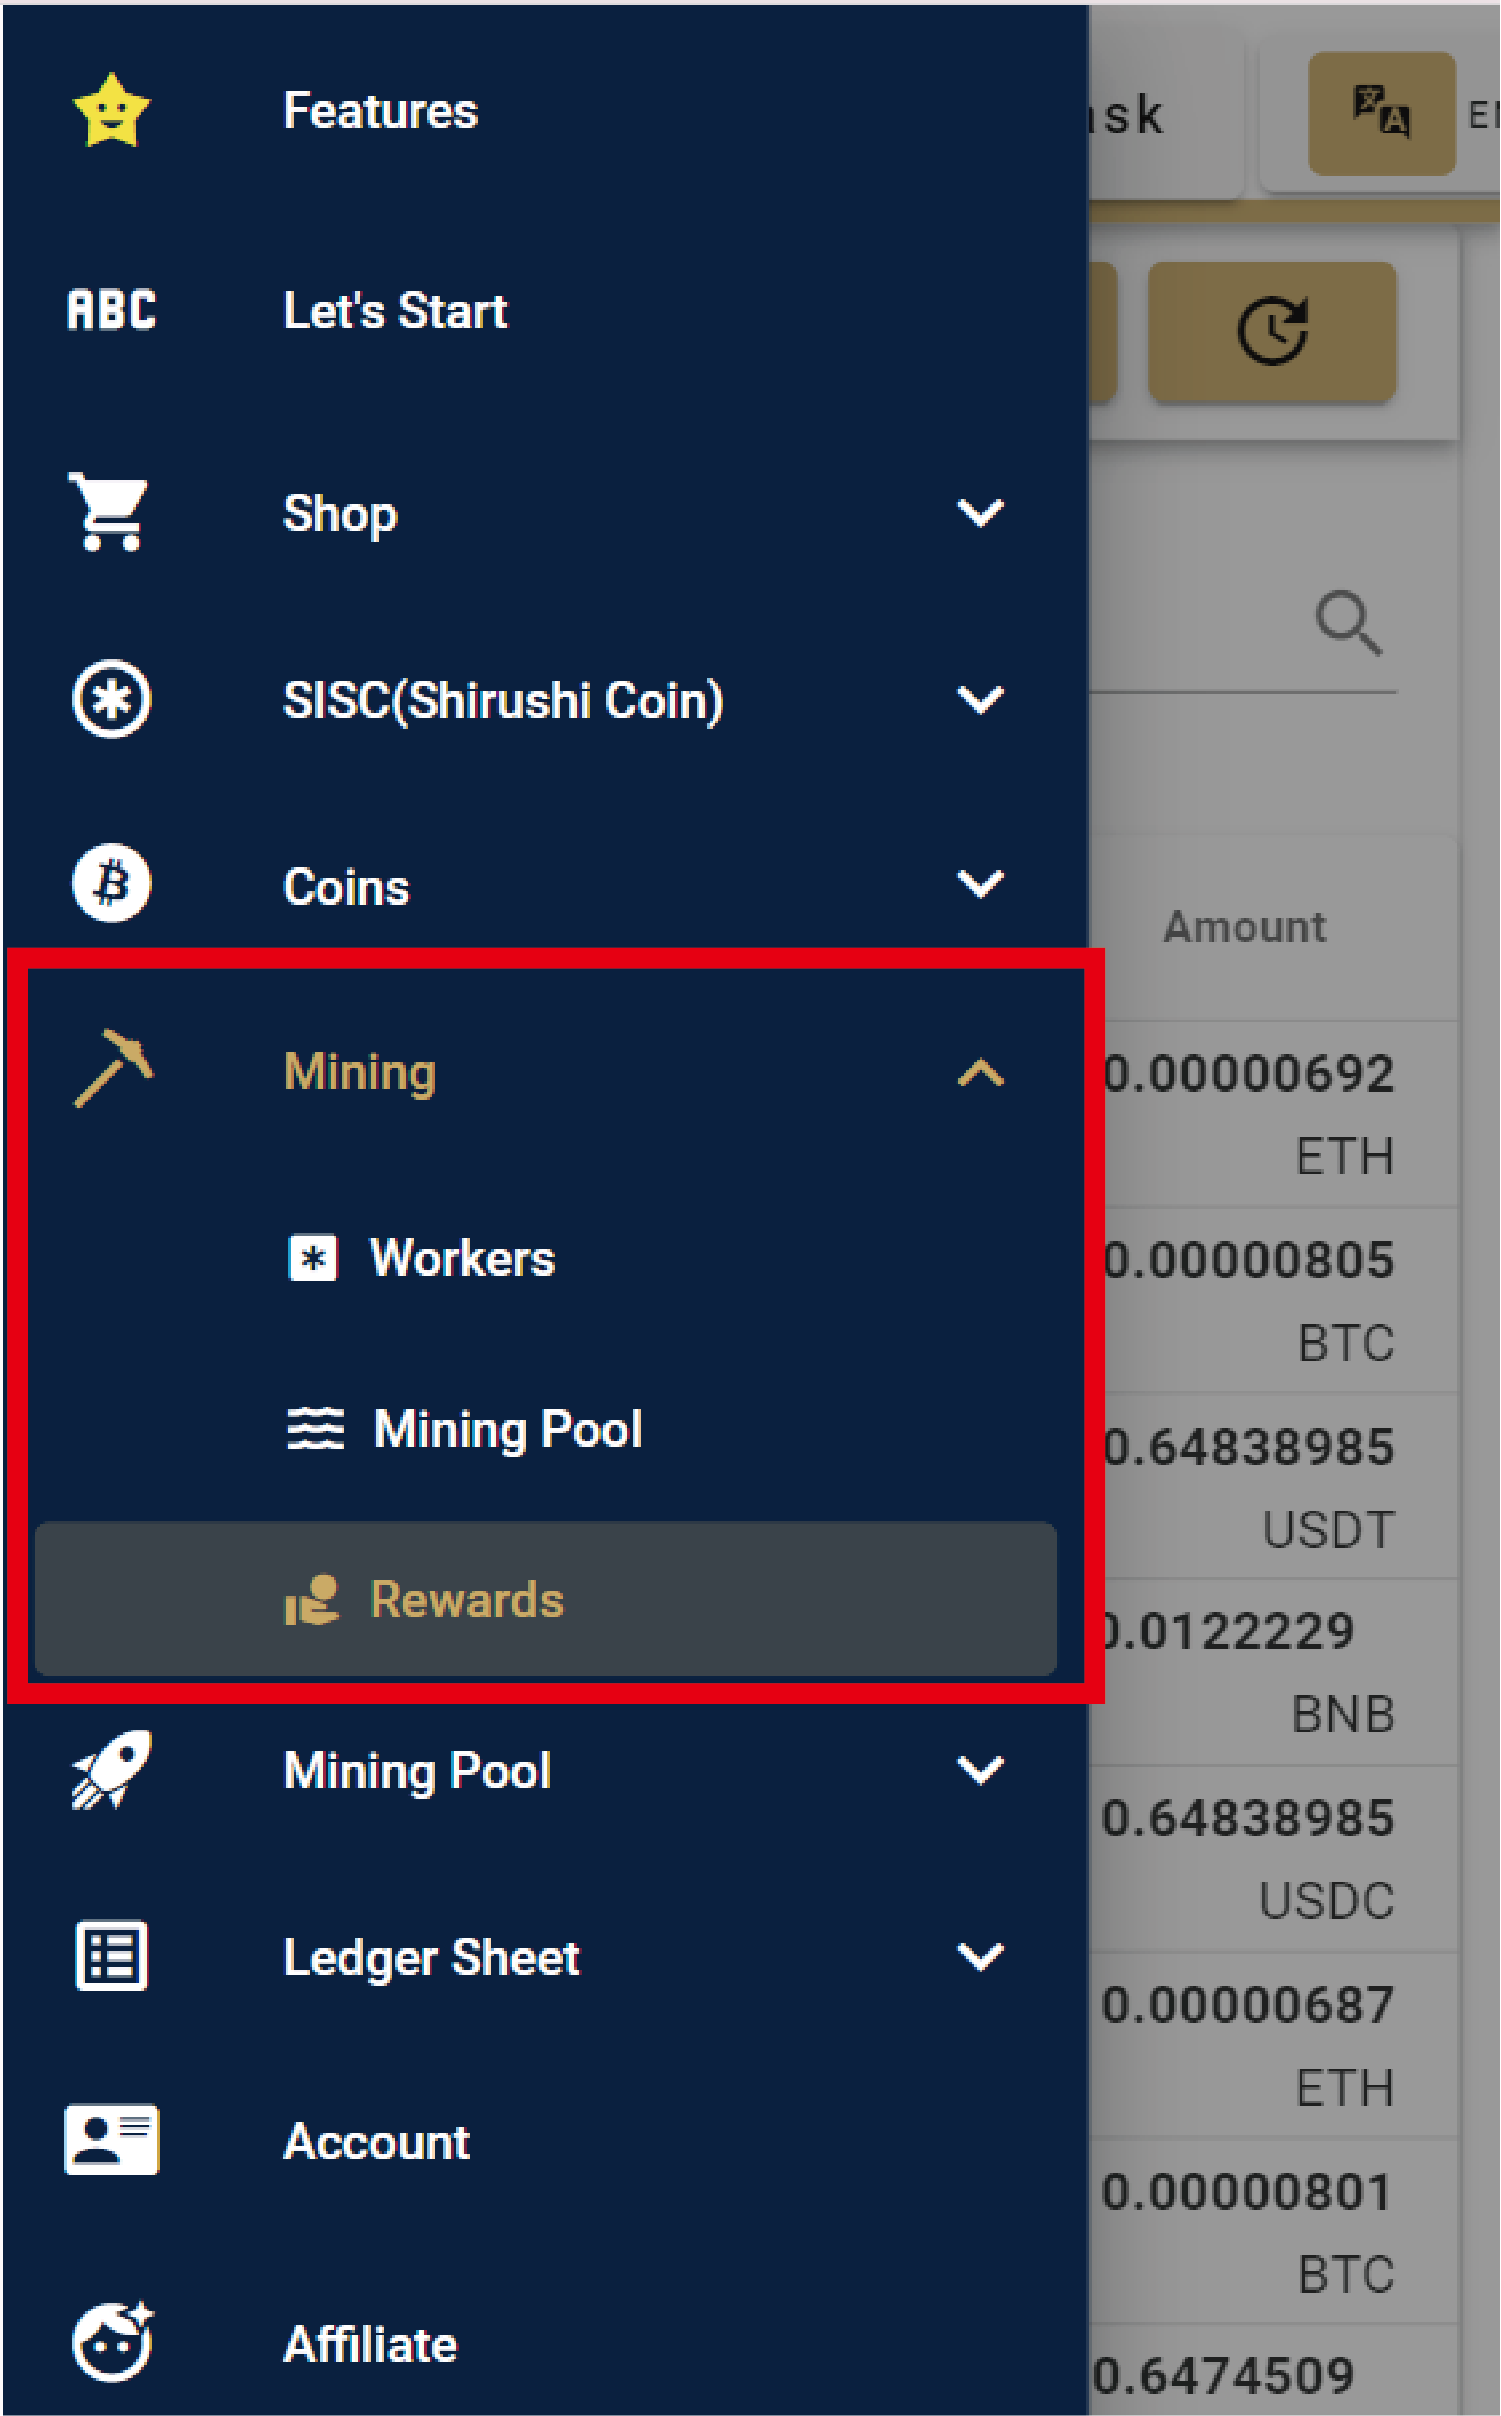
How to check your mining rewardsFrom "Mining > History", you can check the history of mining rewards you have received.
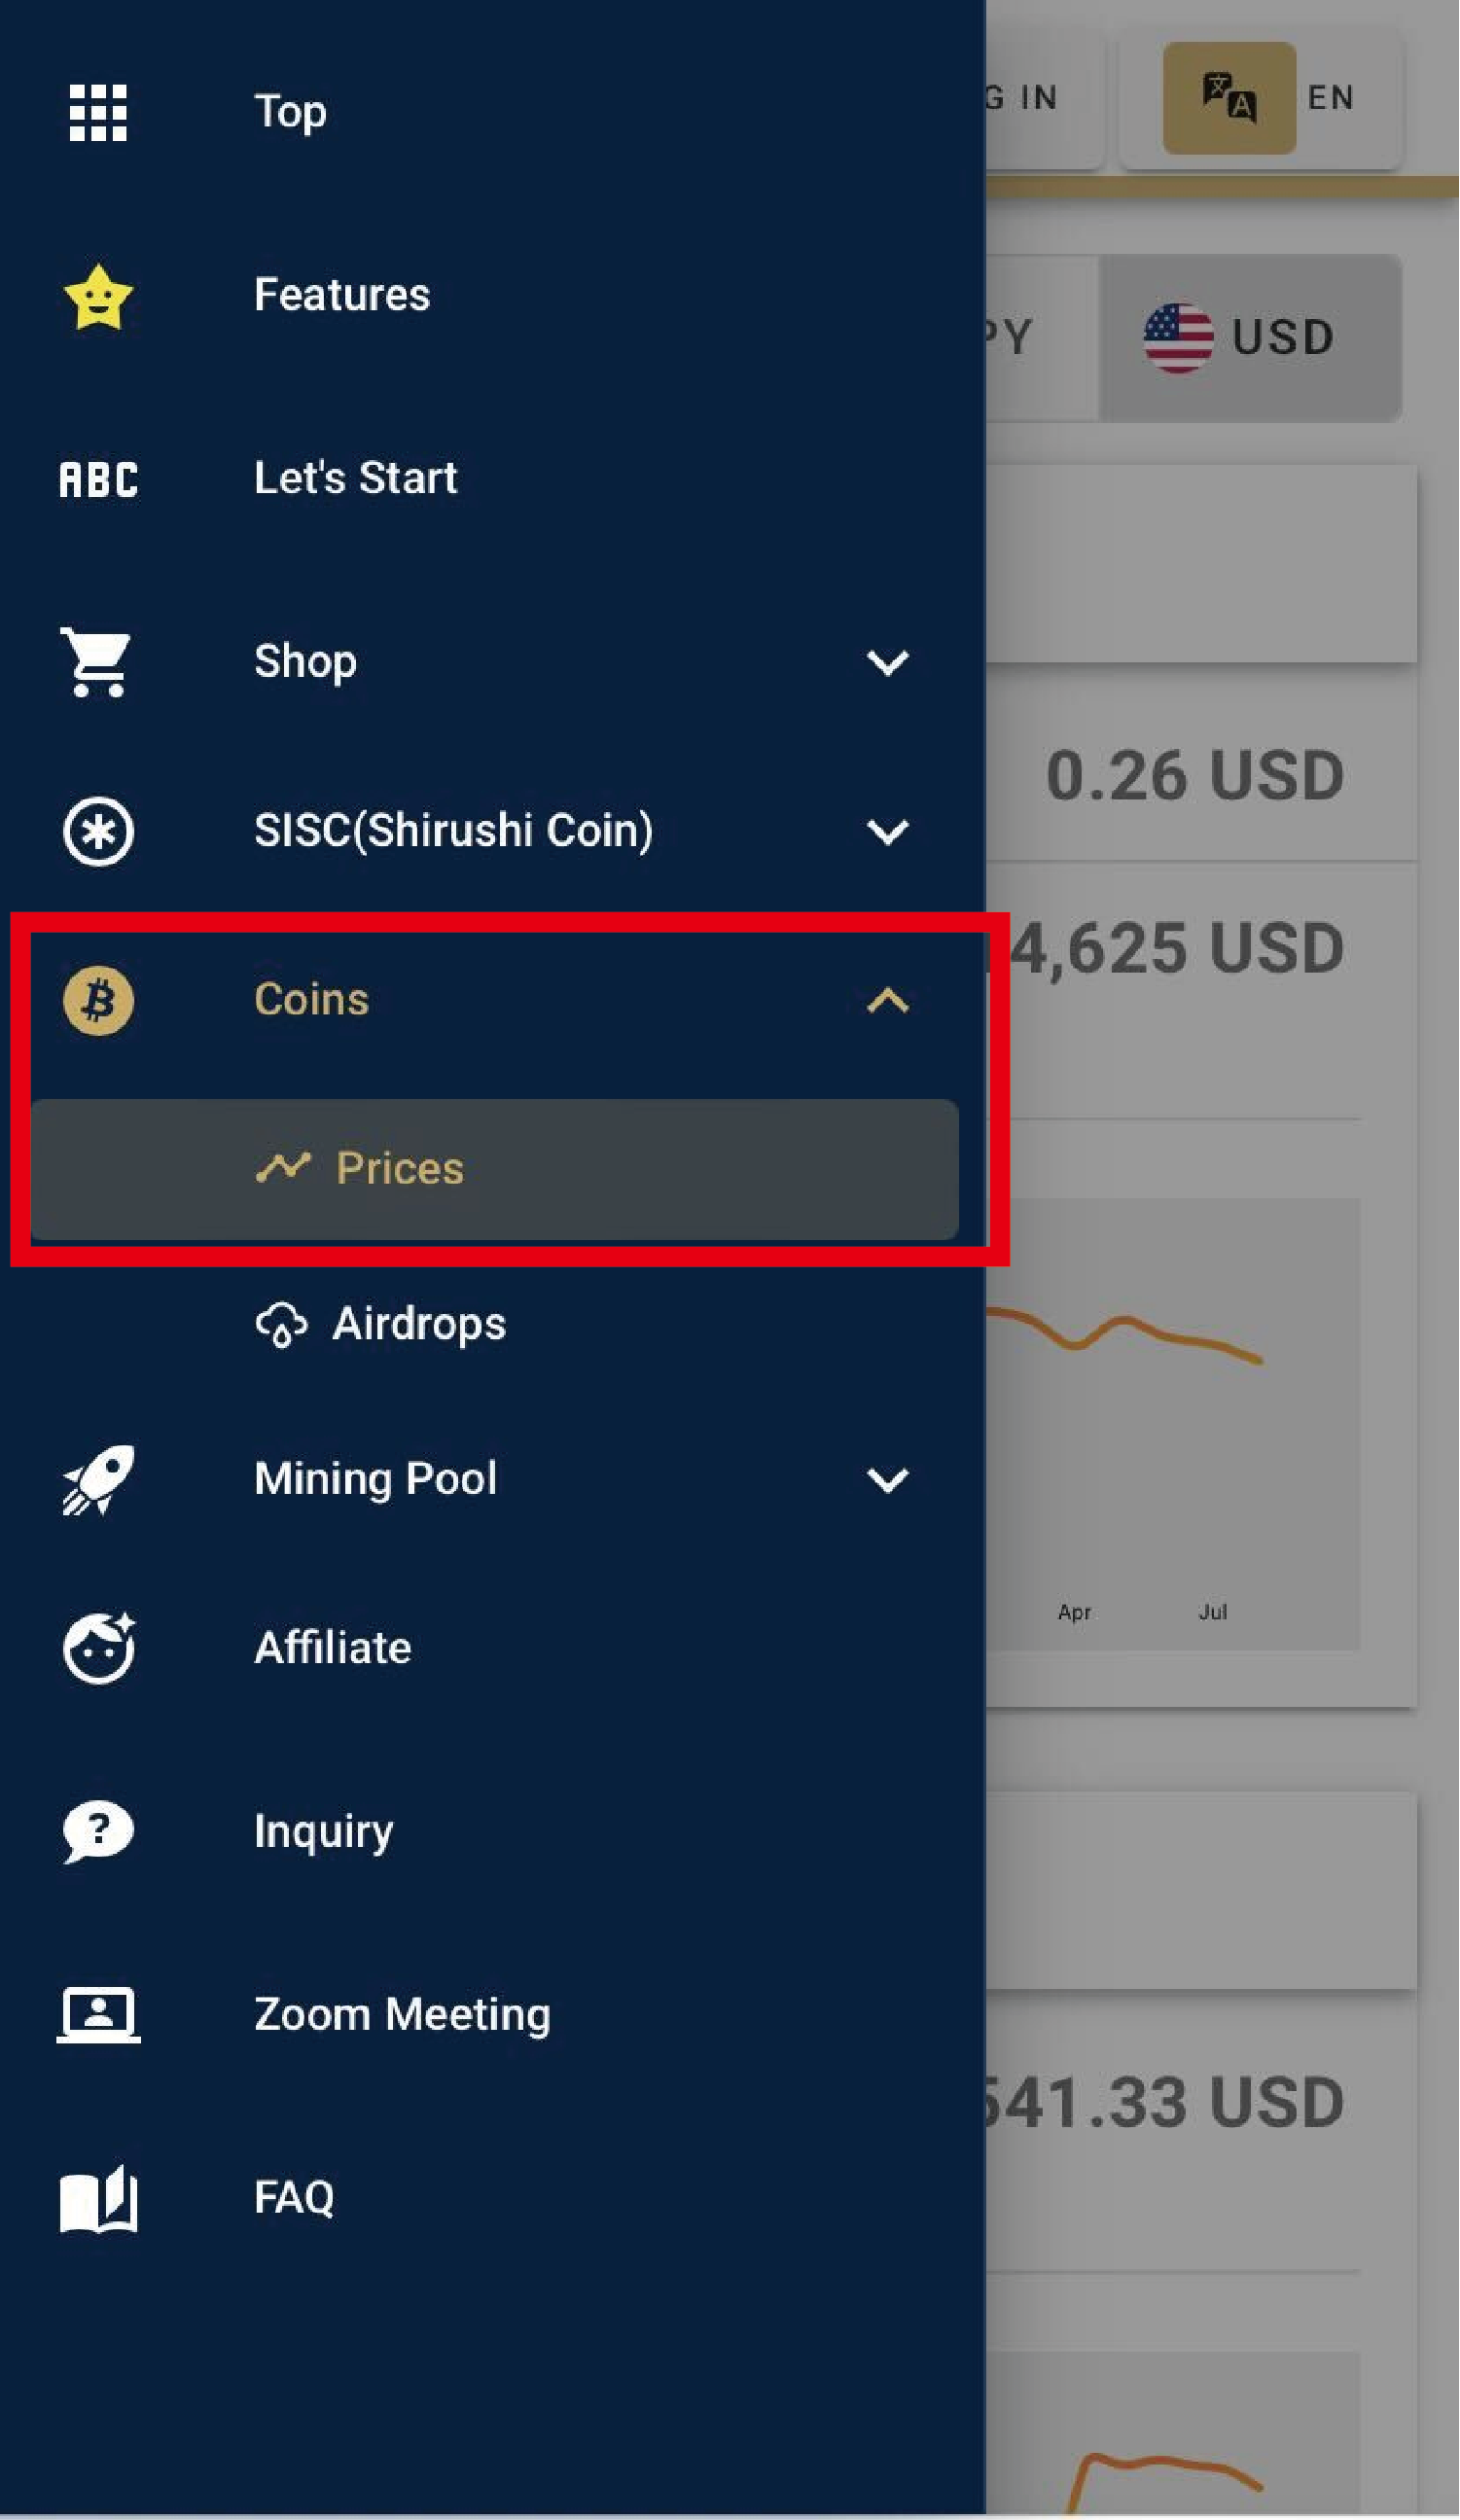
From "Coin > Price", you can check SISC's daily price and market capitalization. This can be used as a reference when receiving coins.
Step5.Mining Boost
Mining Boost is a service that grows your coins simply by leaving them in the mining pool each day.
Coins compound monthly and can be withdrawn at any time.
You can also change coins in the mining pool into another coin or convert them to Japanese yen.
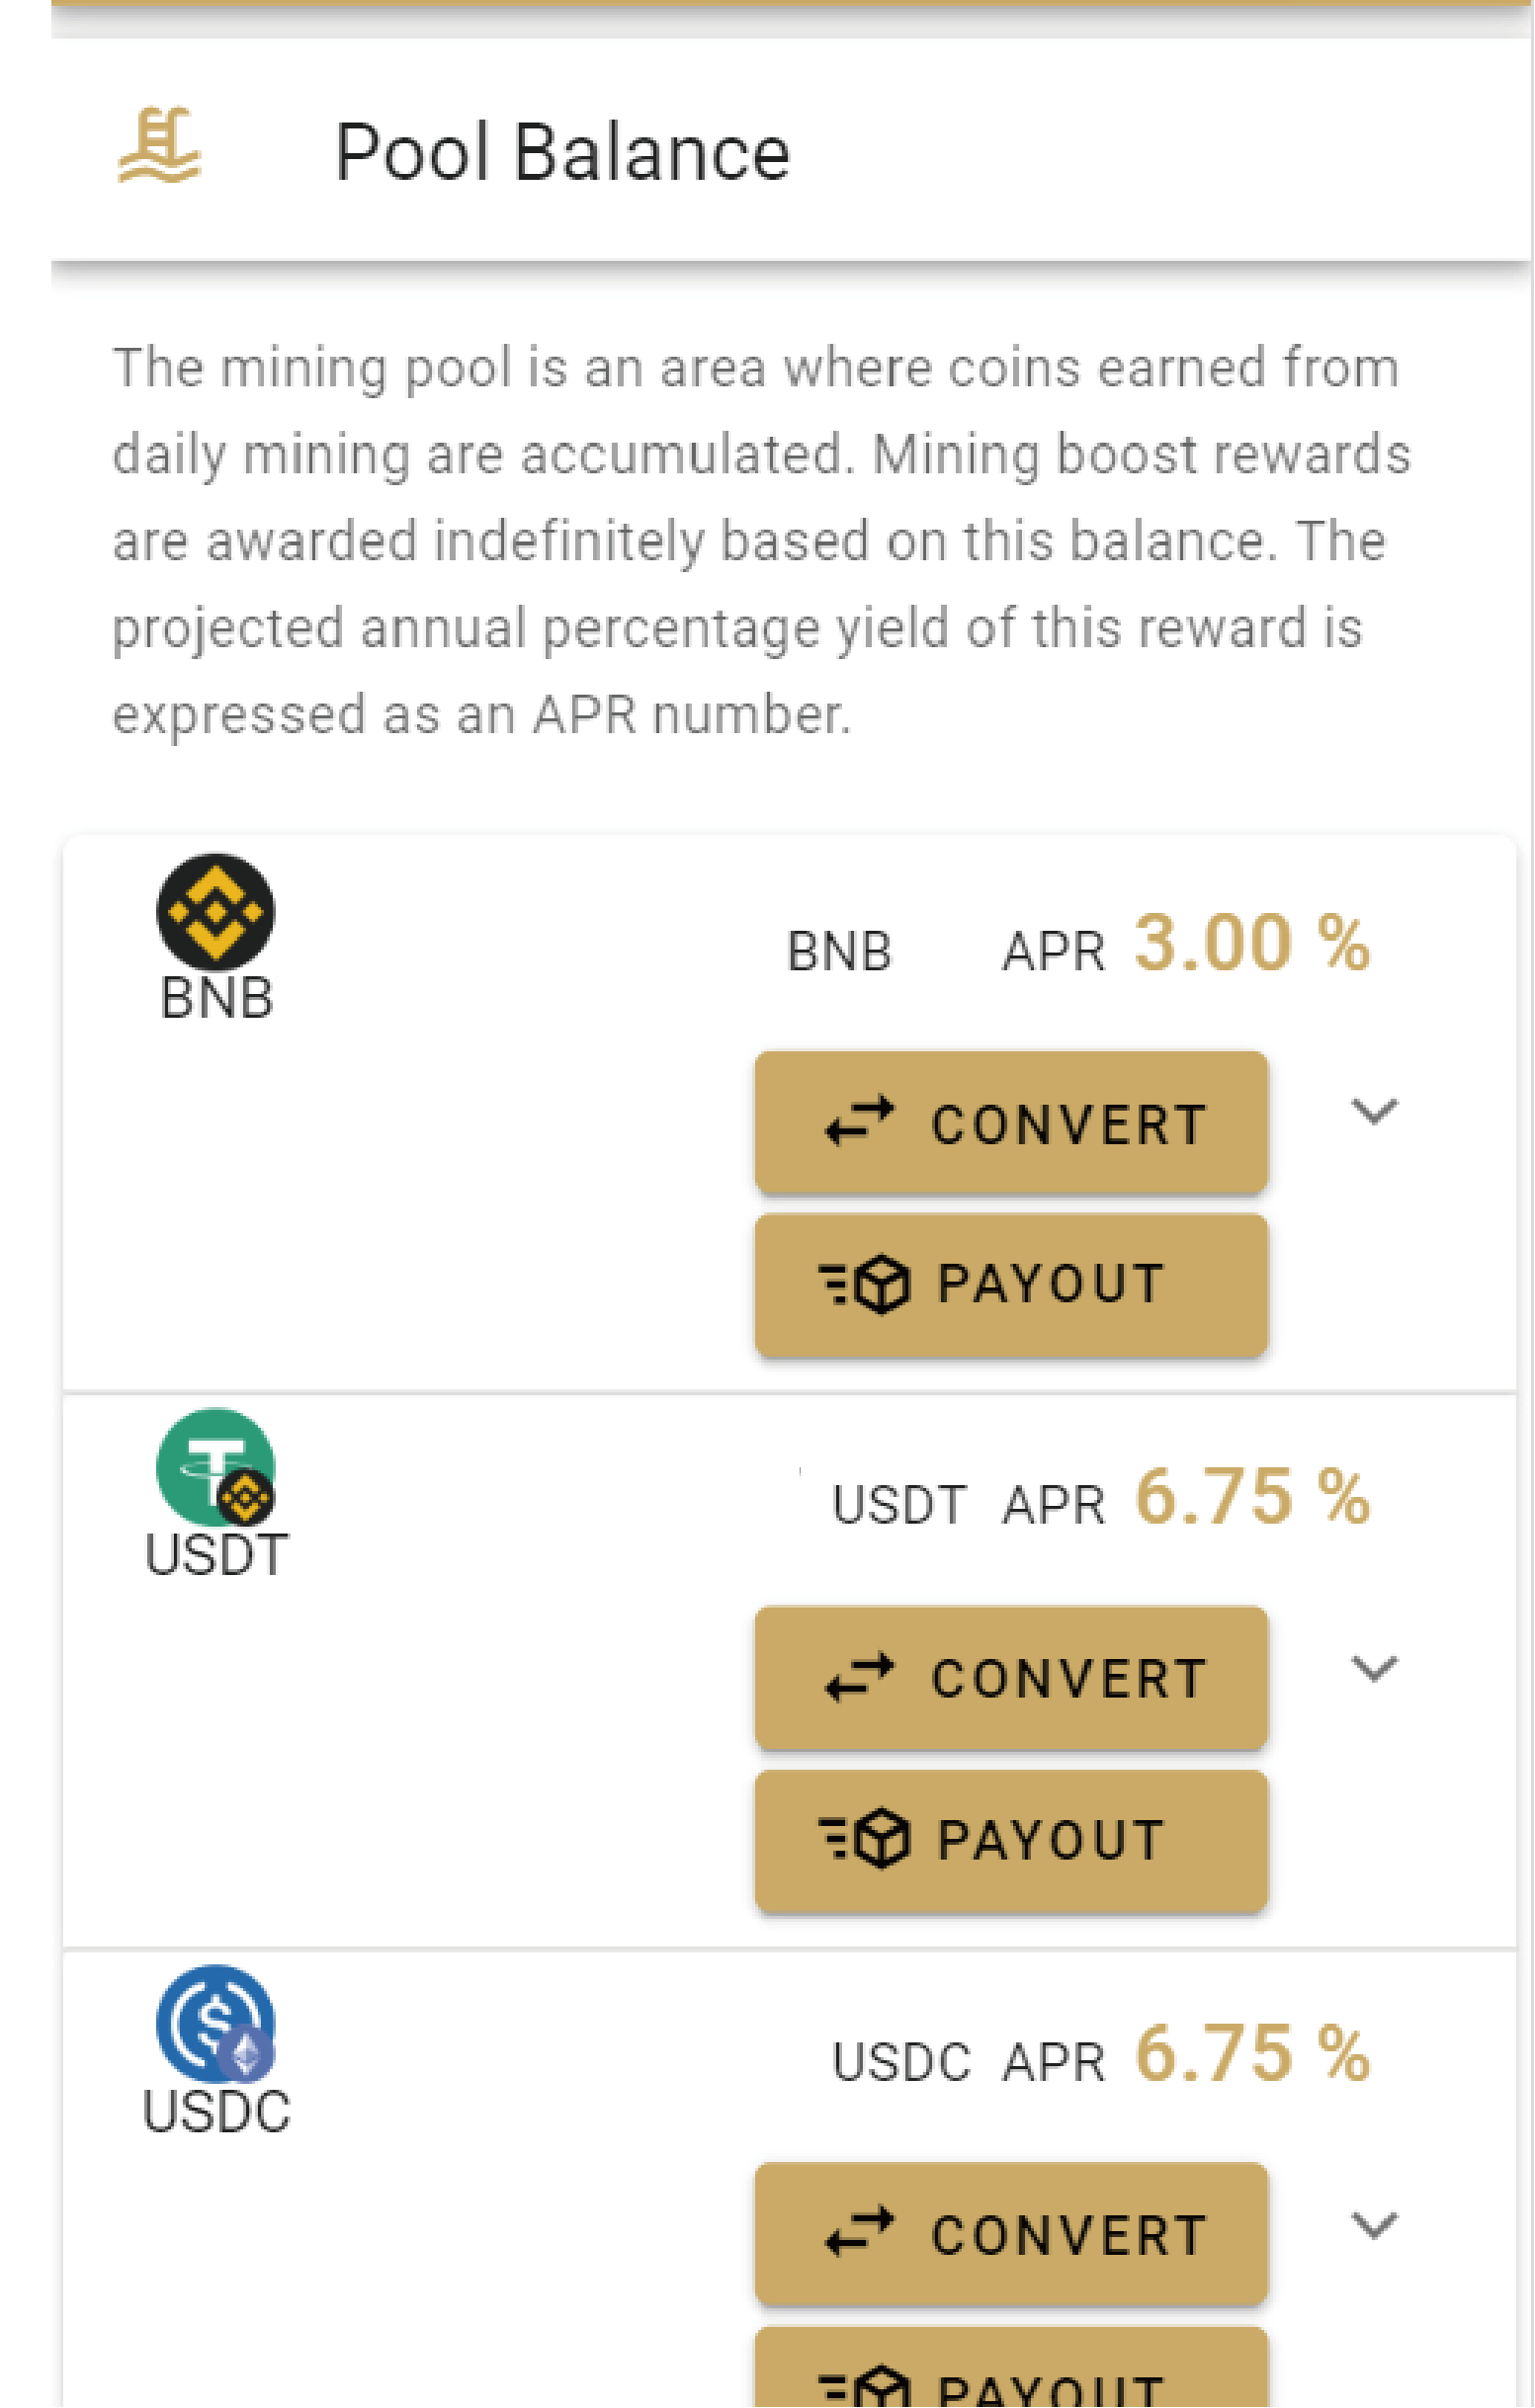
Check your coin balanceUnder "Mining Boost > Mining Pool", you can check the balance of coins earned from daily mining.
Mining Boost rewards will be awarded indefinitely based on this balance. The projected annual percentage yield of this reward is expressed as an "APR" value.
Step6.Receiving Coins
Coins earned by mining can be withdrawn from the mining pool.
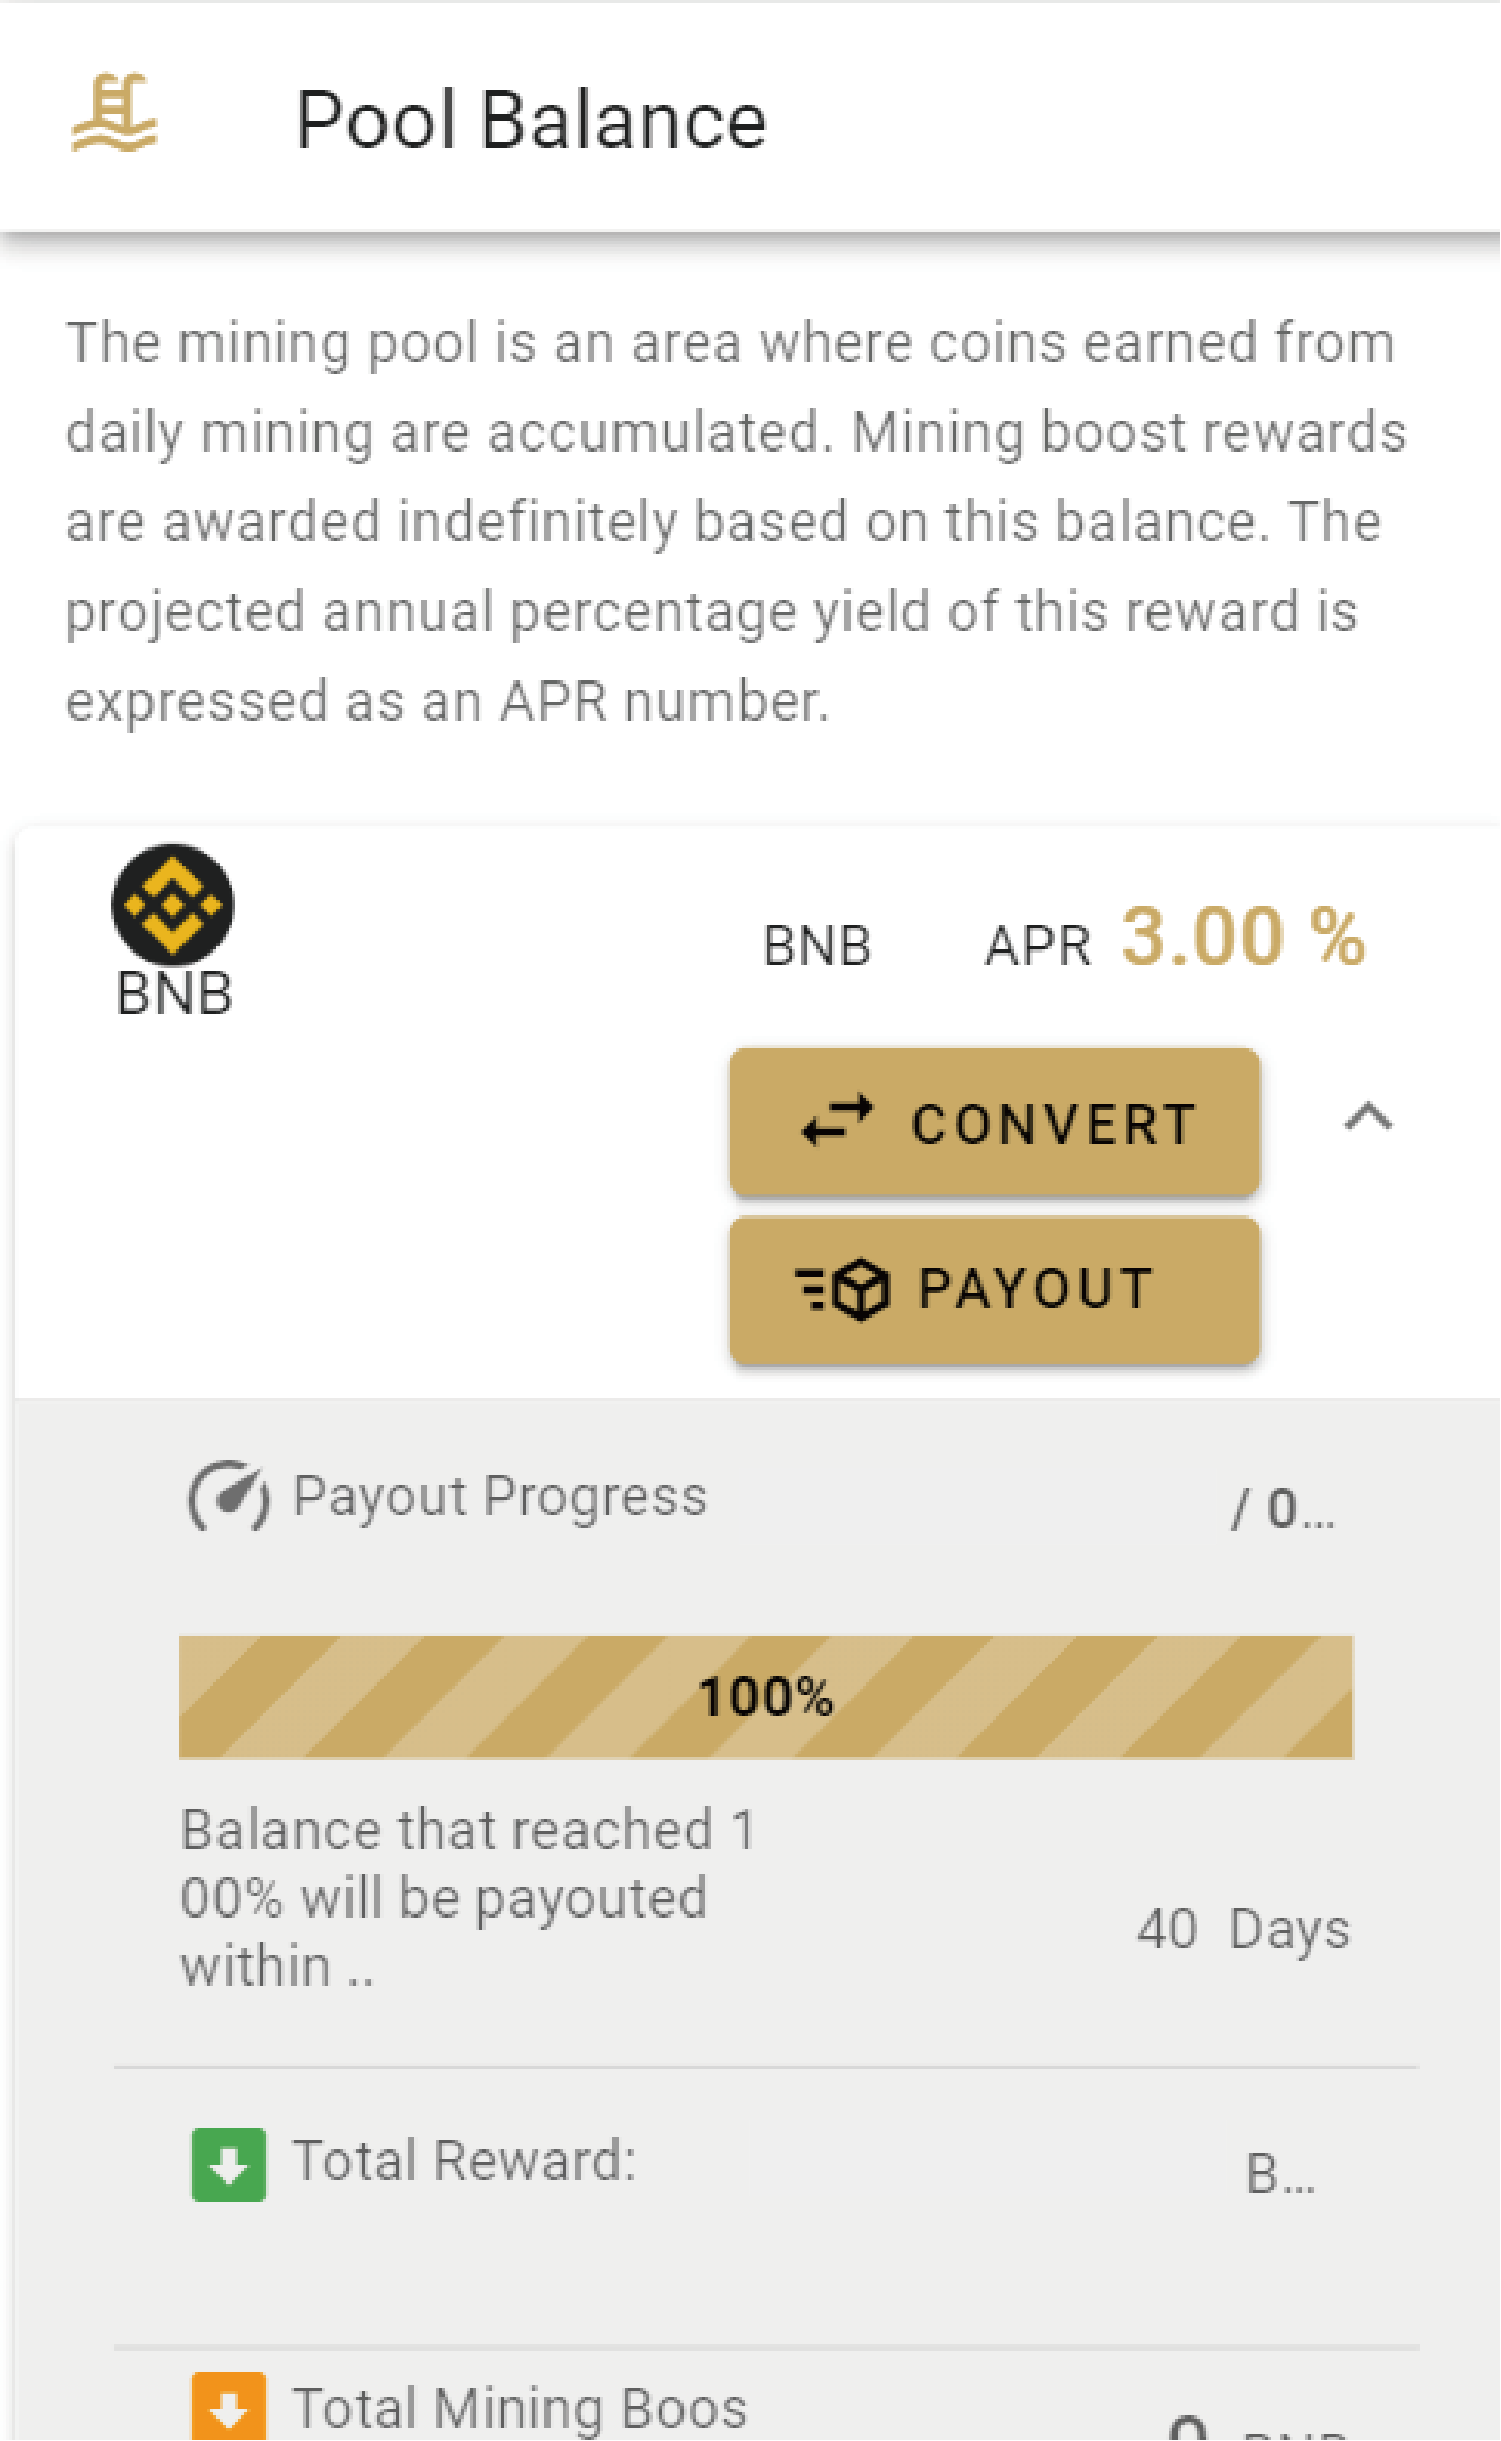
Check your balanceUnder "Mining Boost > Mining Pool", you can check the balance in the pool for each coin.
You can withdraw within 40 days once your payout progress reaches 100%.
※ You will need to log in to check your mining pool.
Coin Payout SettingsYou can receive your coins by going to "Mining Boost > Mining Boost Settings" and changing the setting to "Disabled".
When set to "Disabled", the mining pool balance will be automatically sent to your designated wallet within 40 days once the threshold is reached.
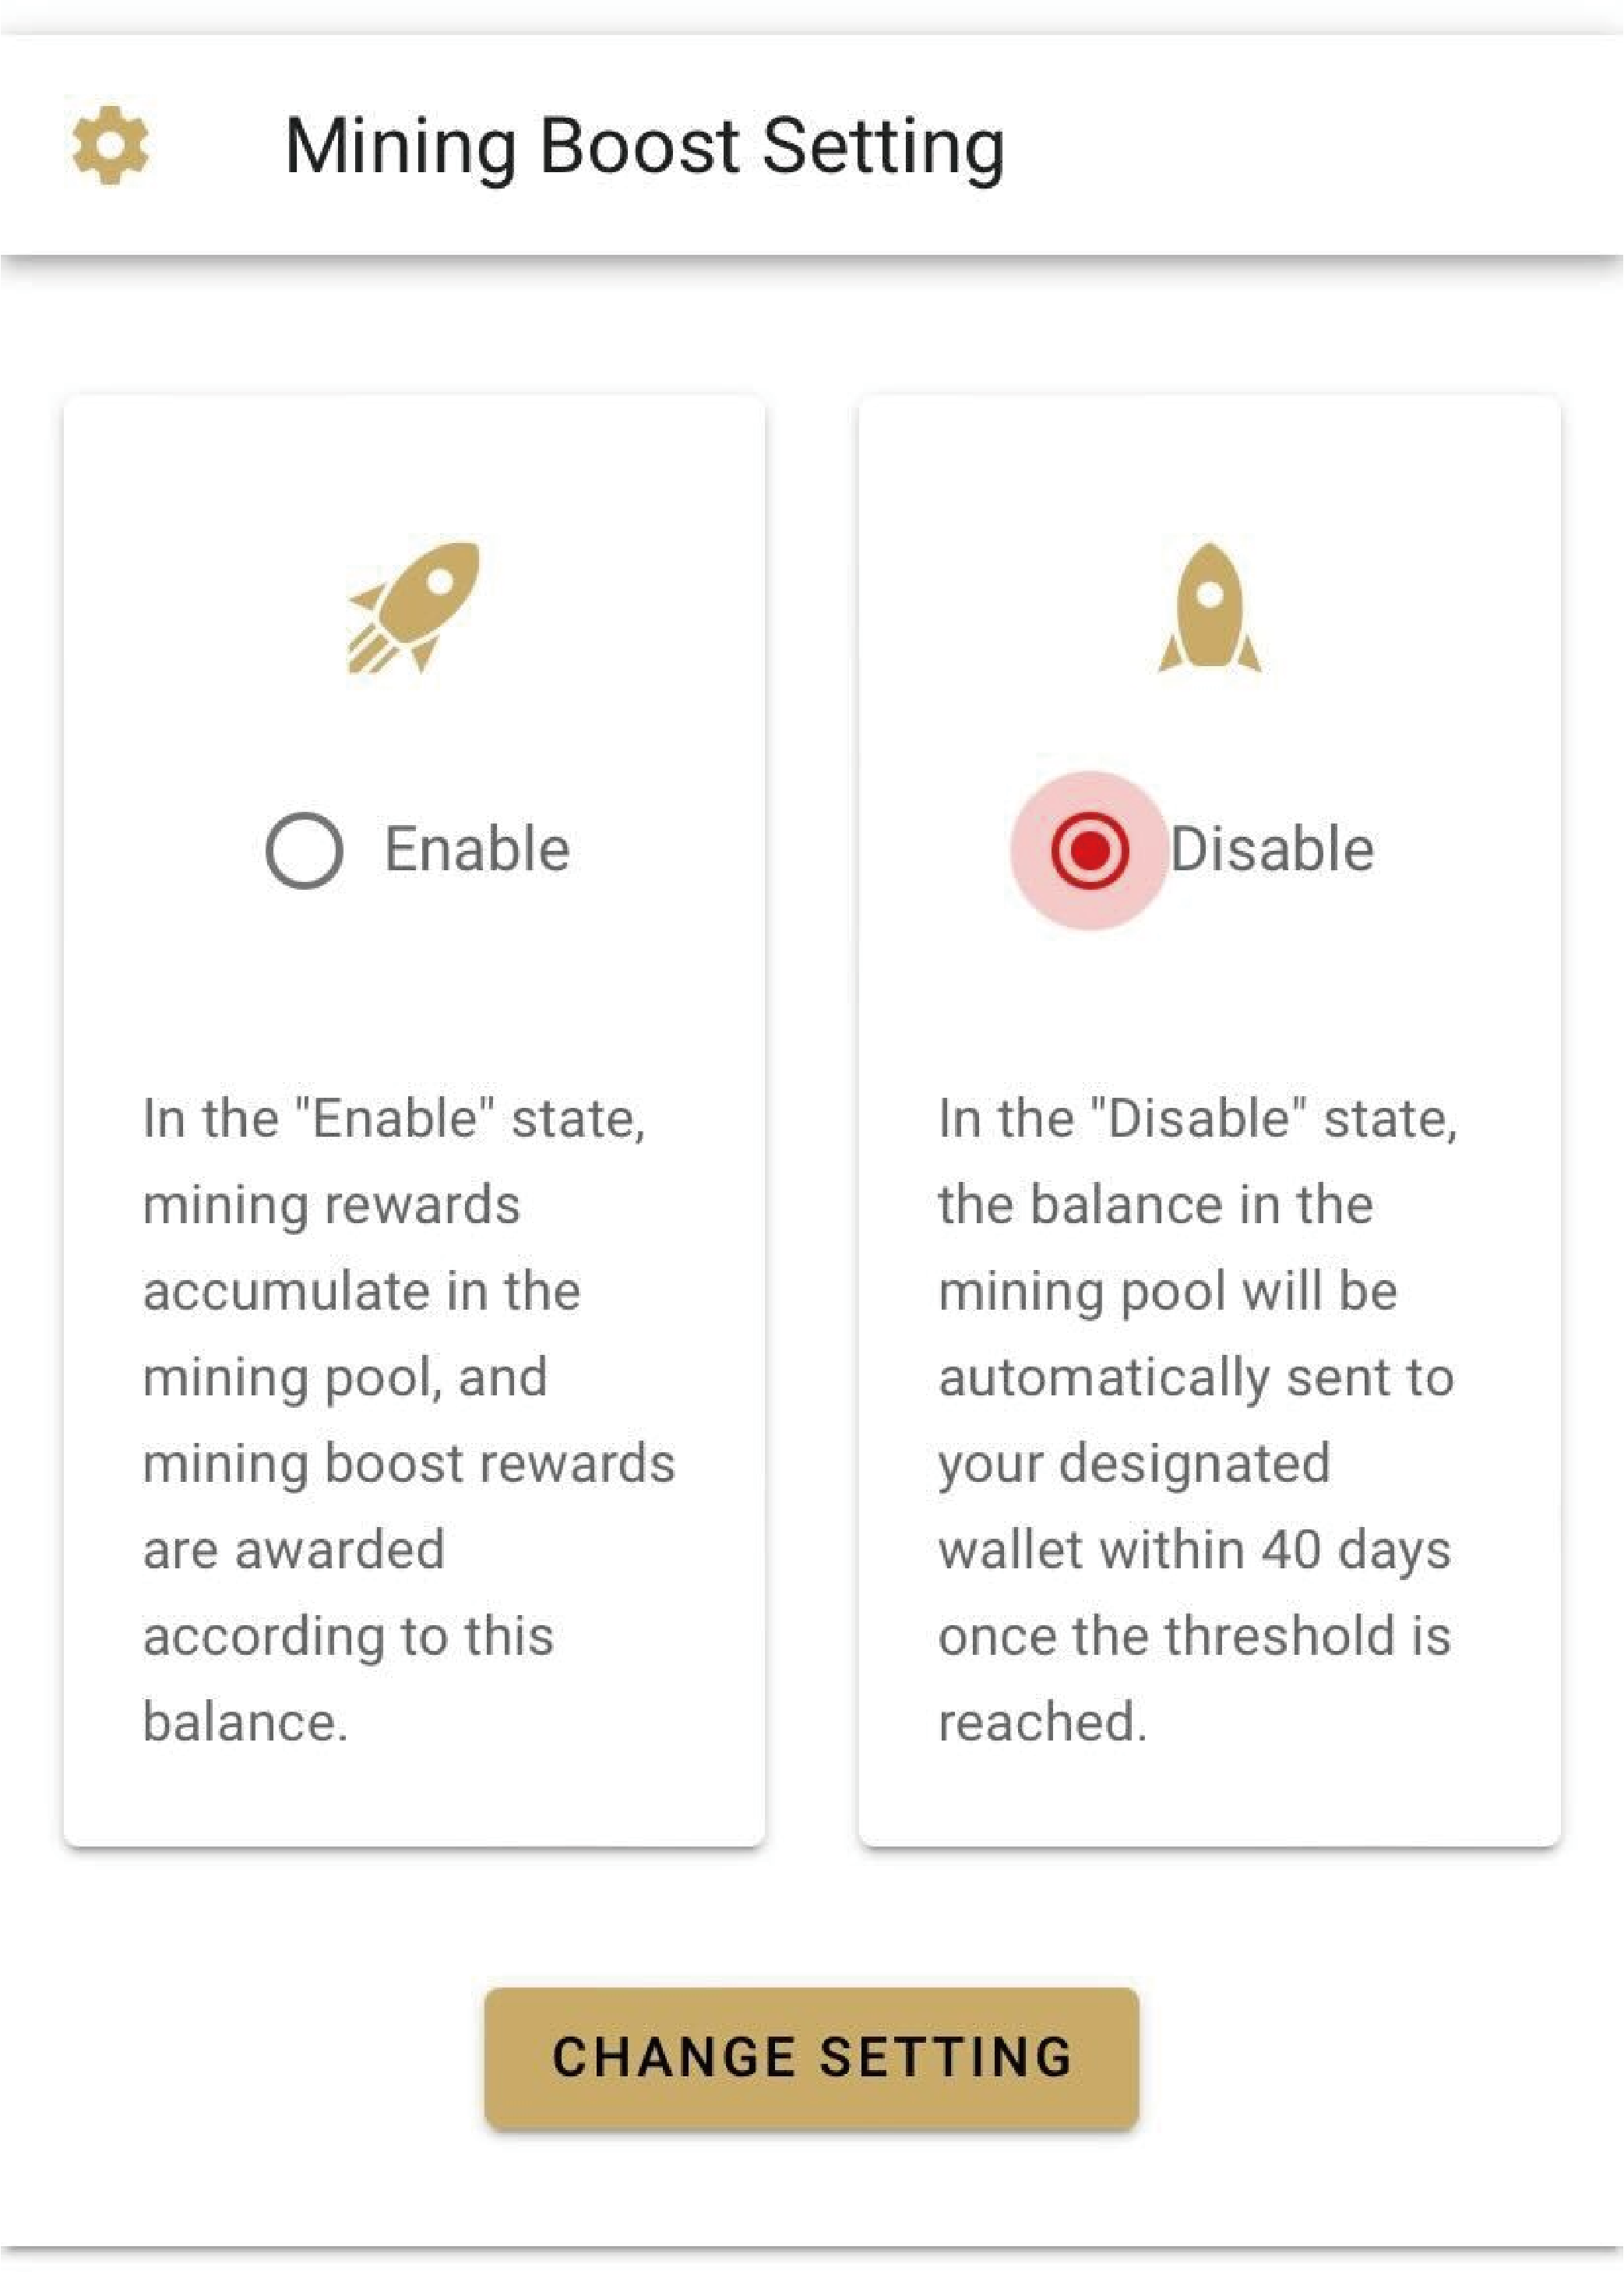
※ You will need to log in to check your Mining Boost settings.
Creating a Wallet
Here we will explain how to create a MetaMask wallet, which allows you to send and receive coins.
Add WalletWe'll walk you through creating a MetaMask account via Google Chrome.
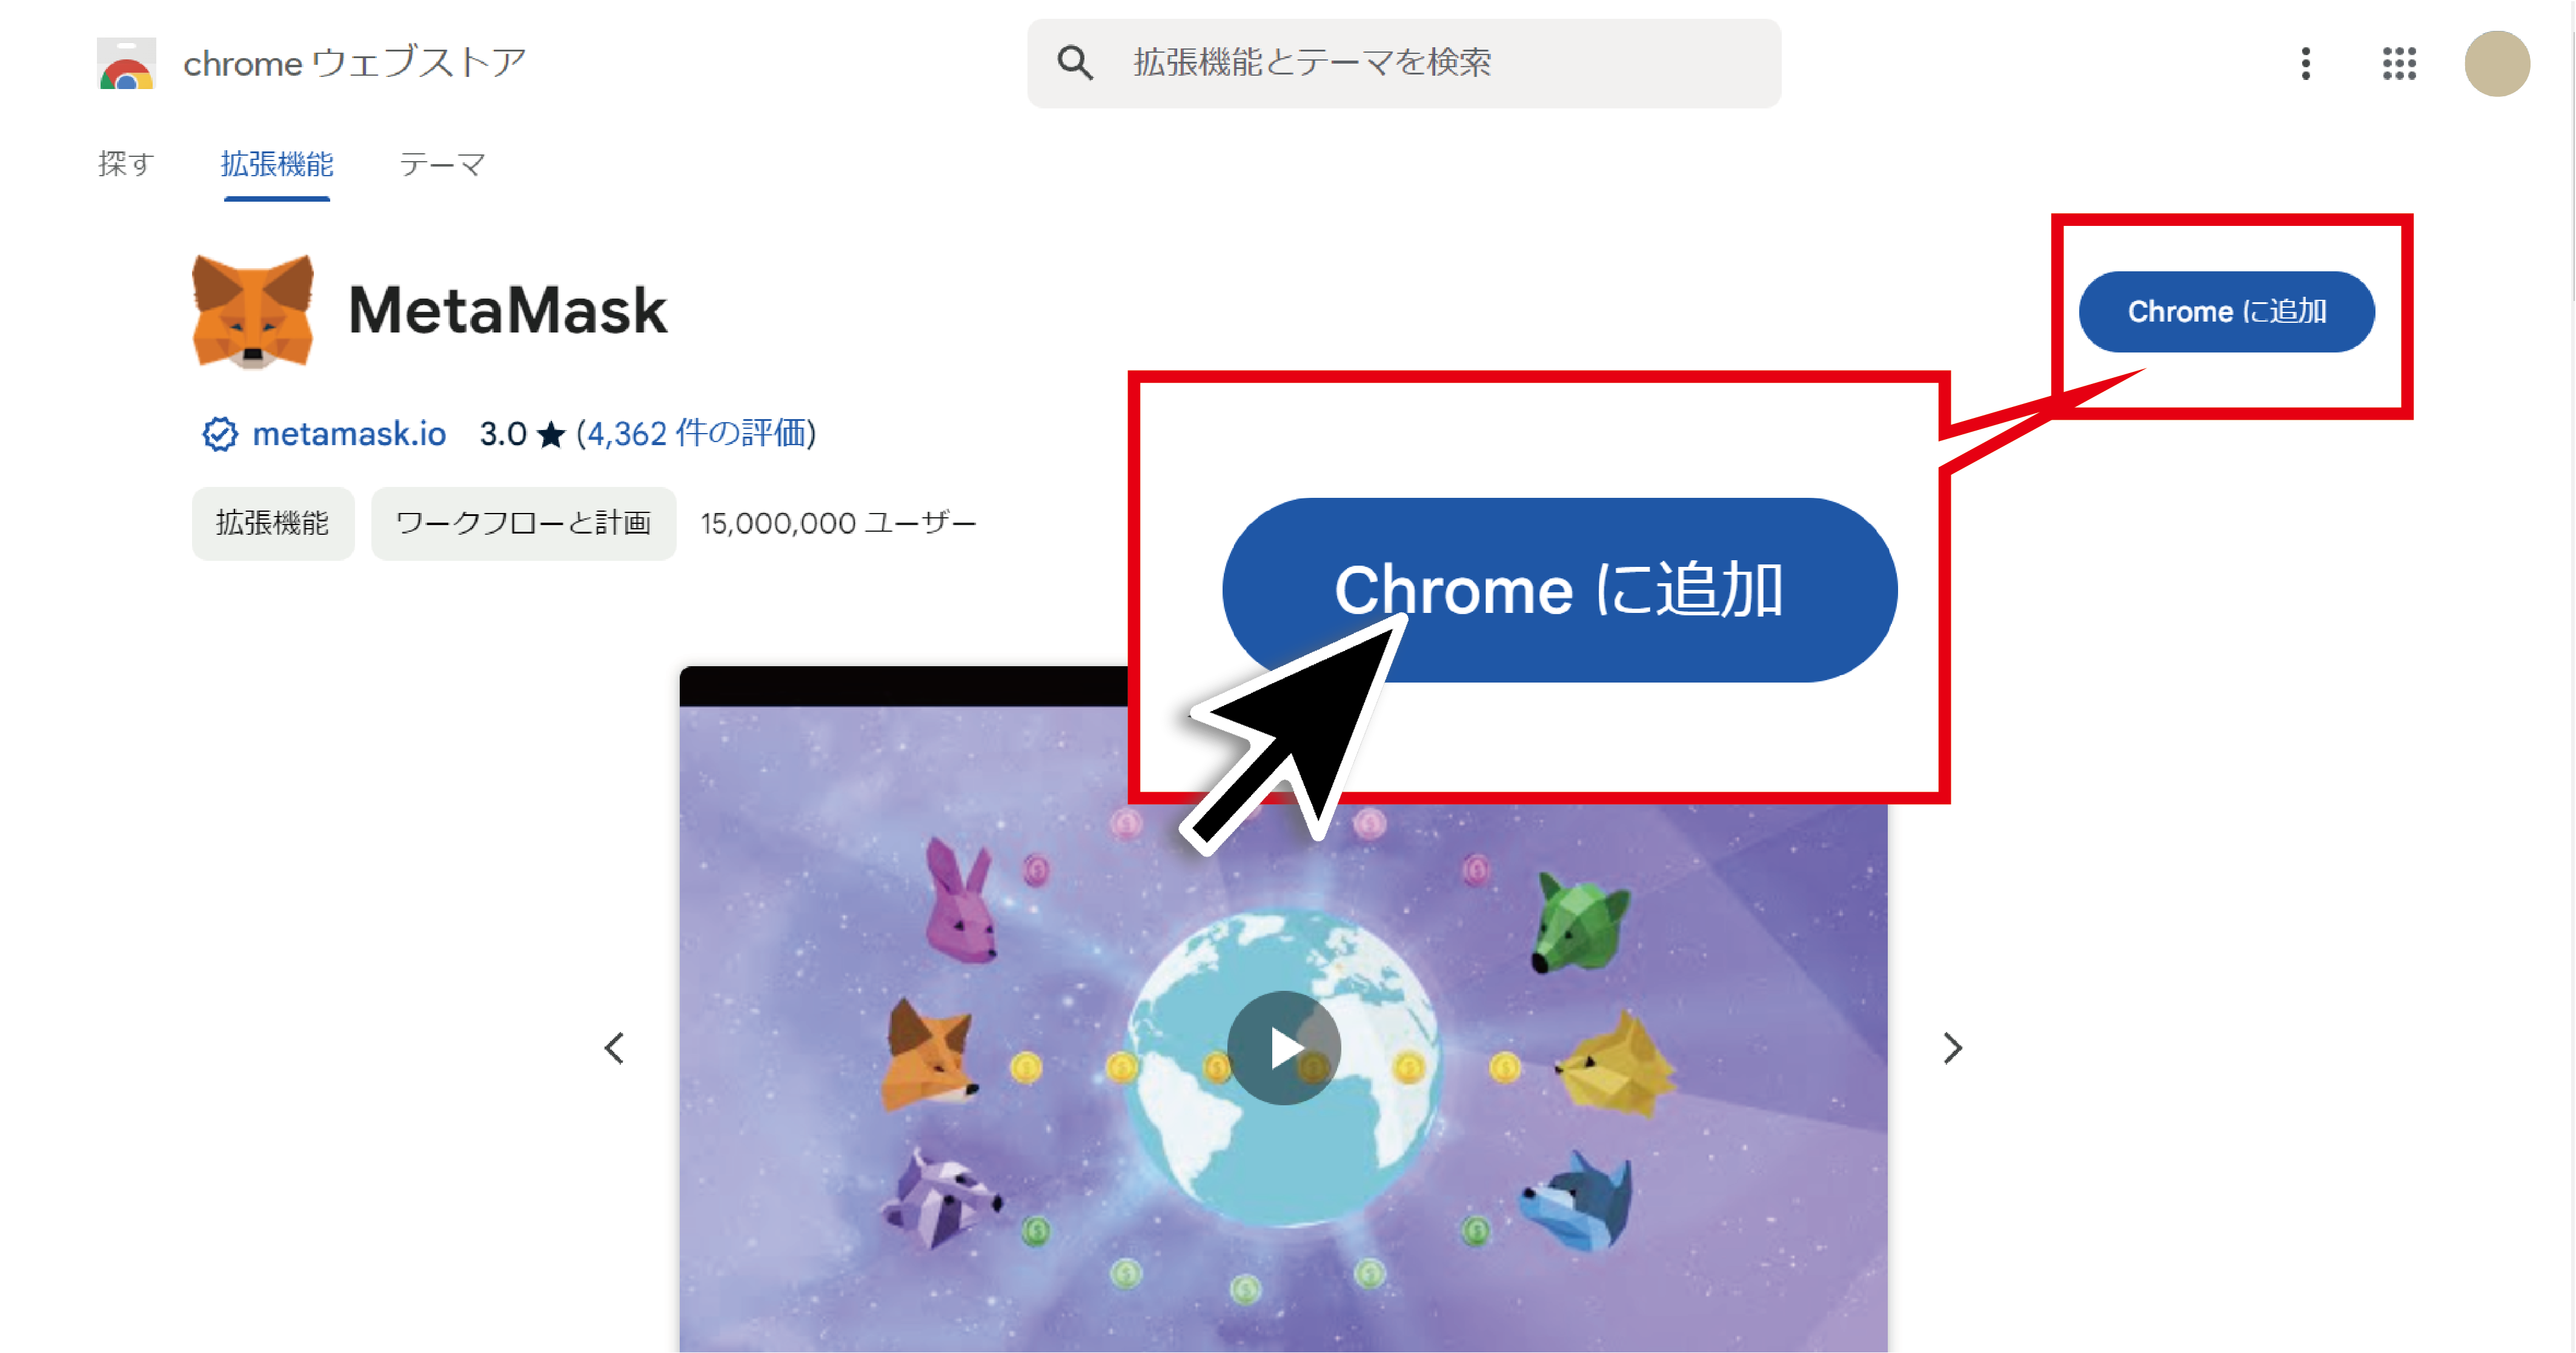
Click here to go to the page shown below, then click "Add to Chrome".
When the pop-up appears, click "Add Extension".
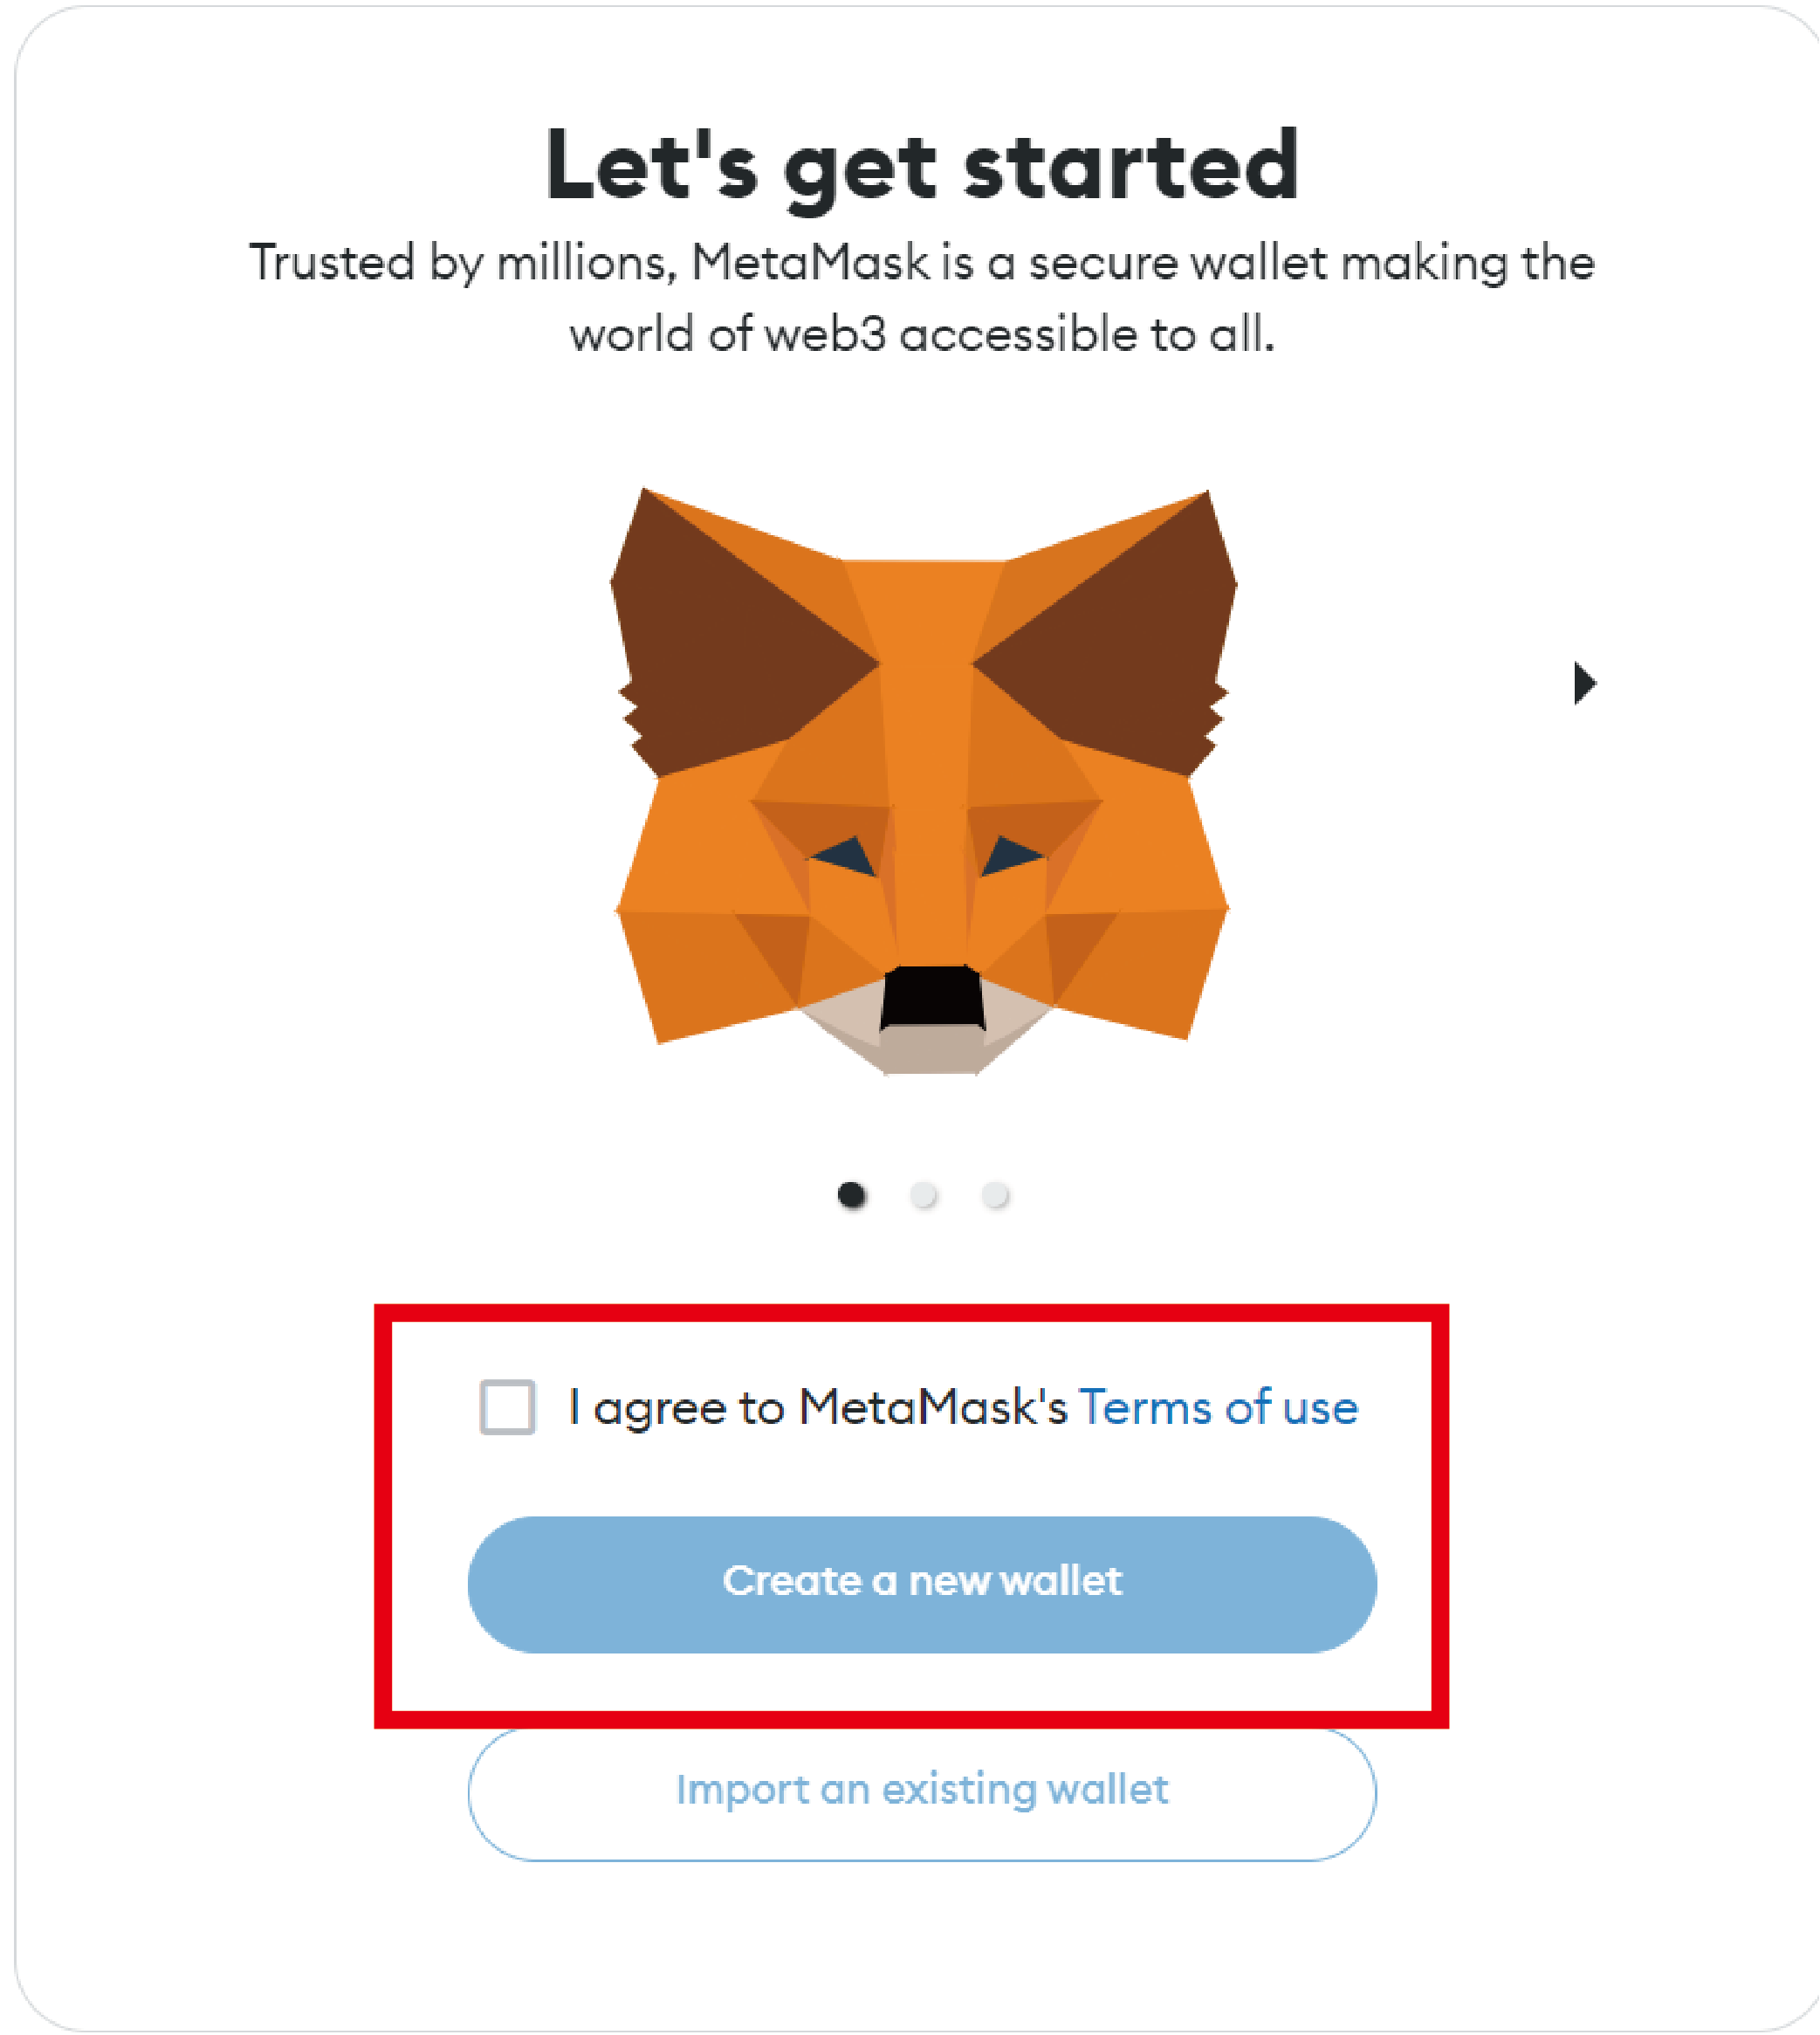
After installation is complete, a new tab will open. Agree to the terms and click "Create a new wallet".
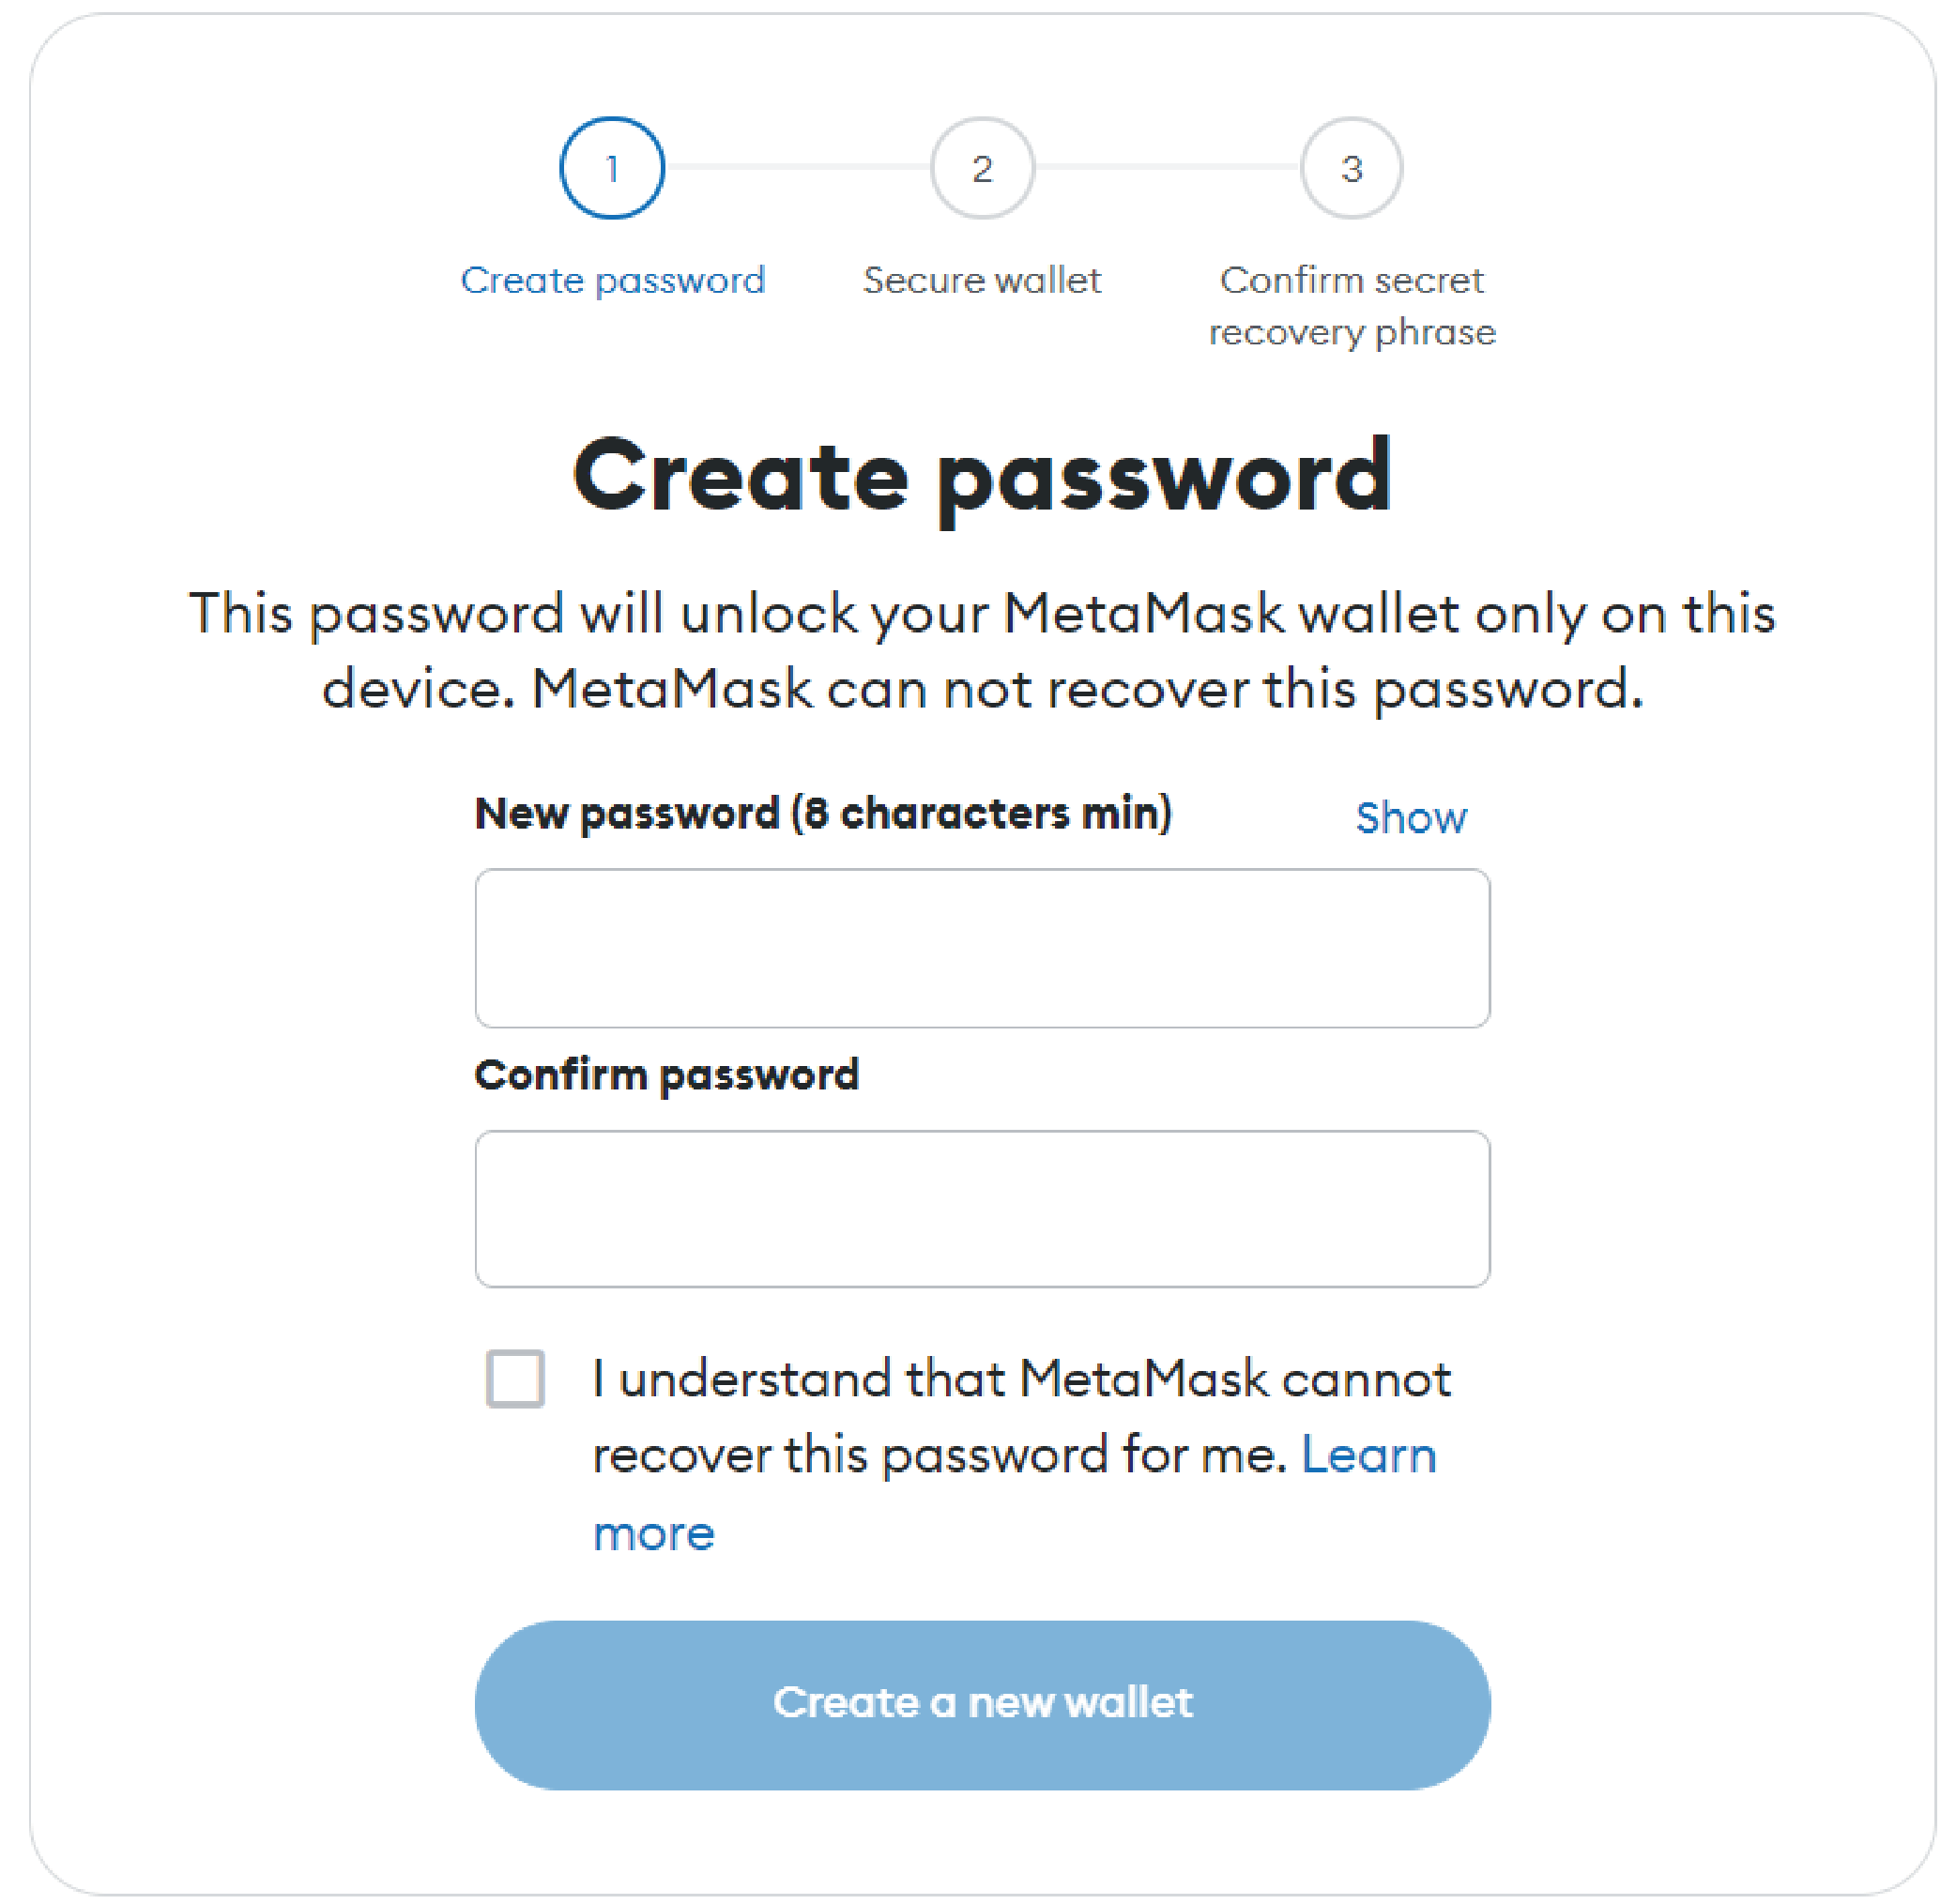
Create a password of at least 8 alphanumeric characters and click "Create a new wallet". You will use this every time you log in to MetaMask, so be sure to remember it.
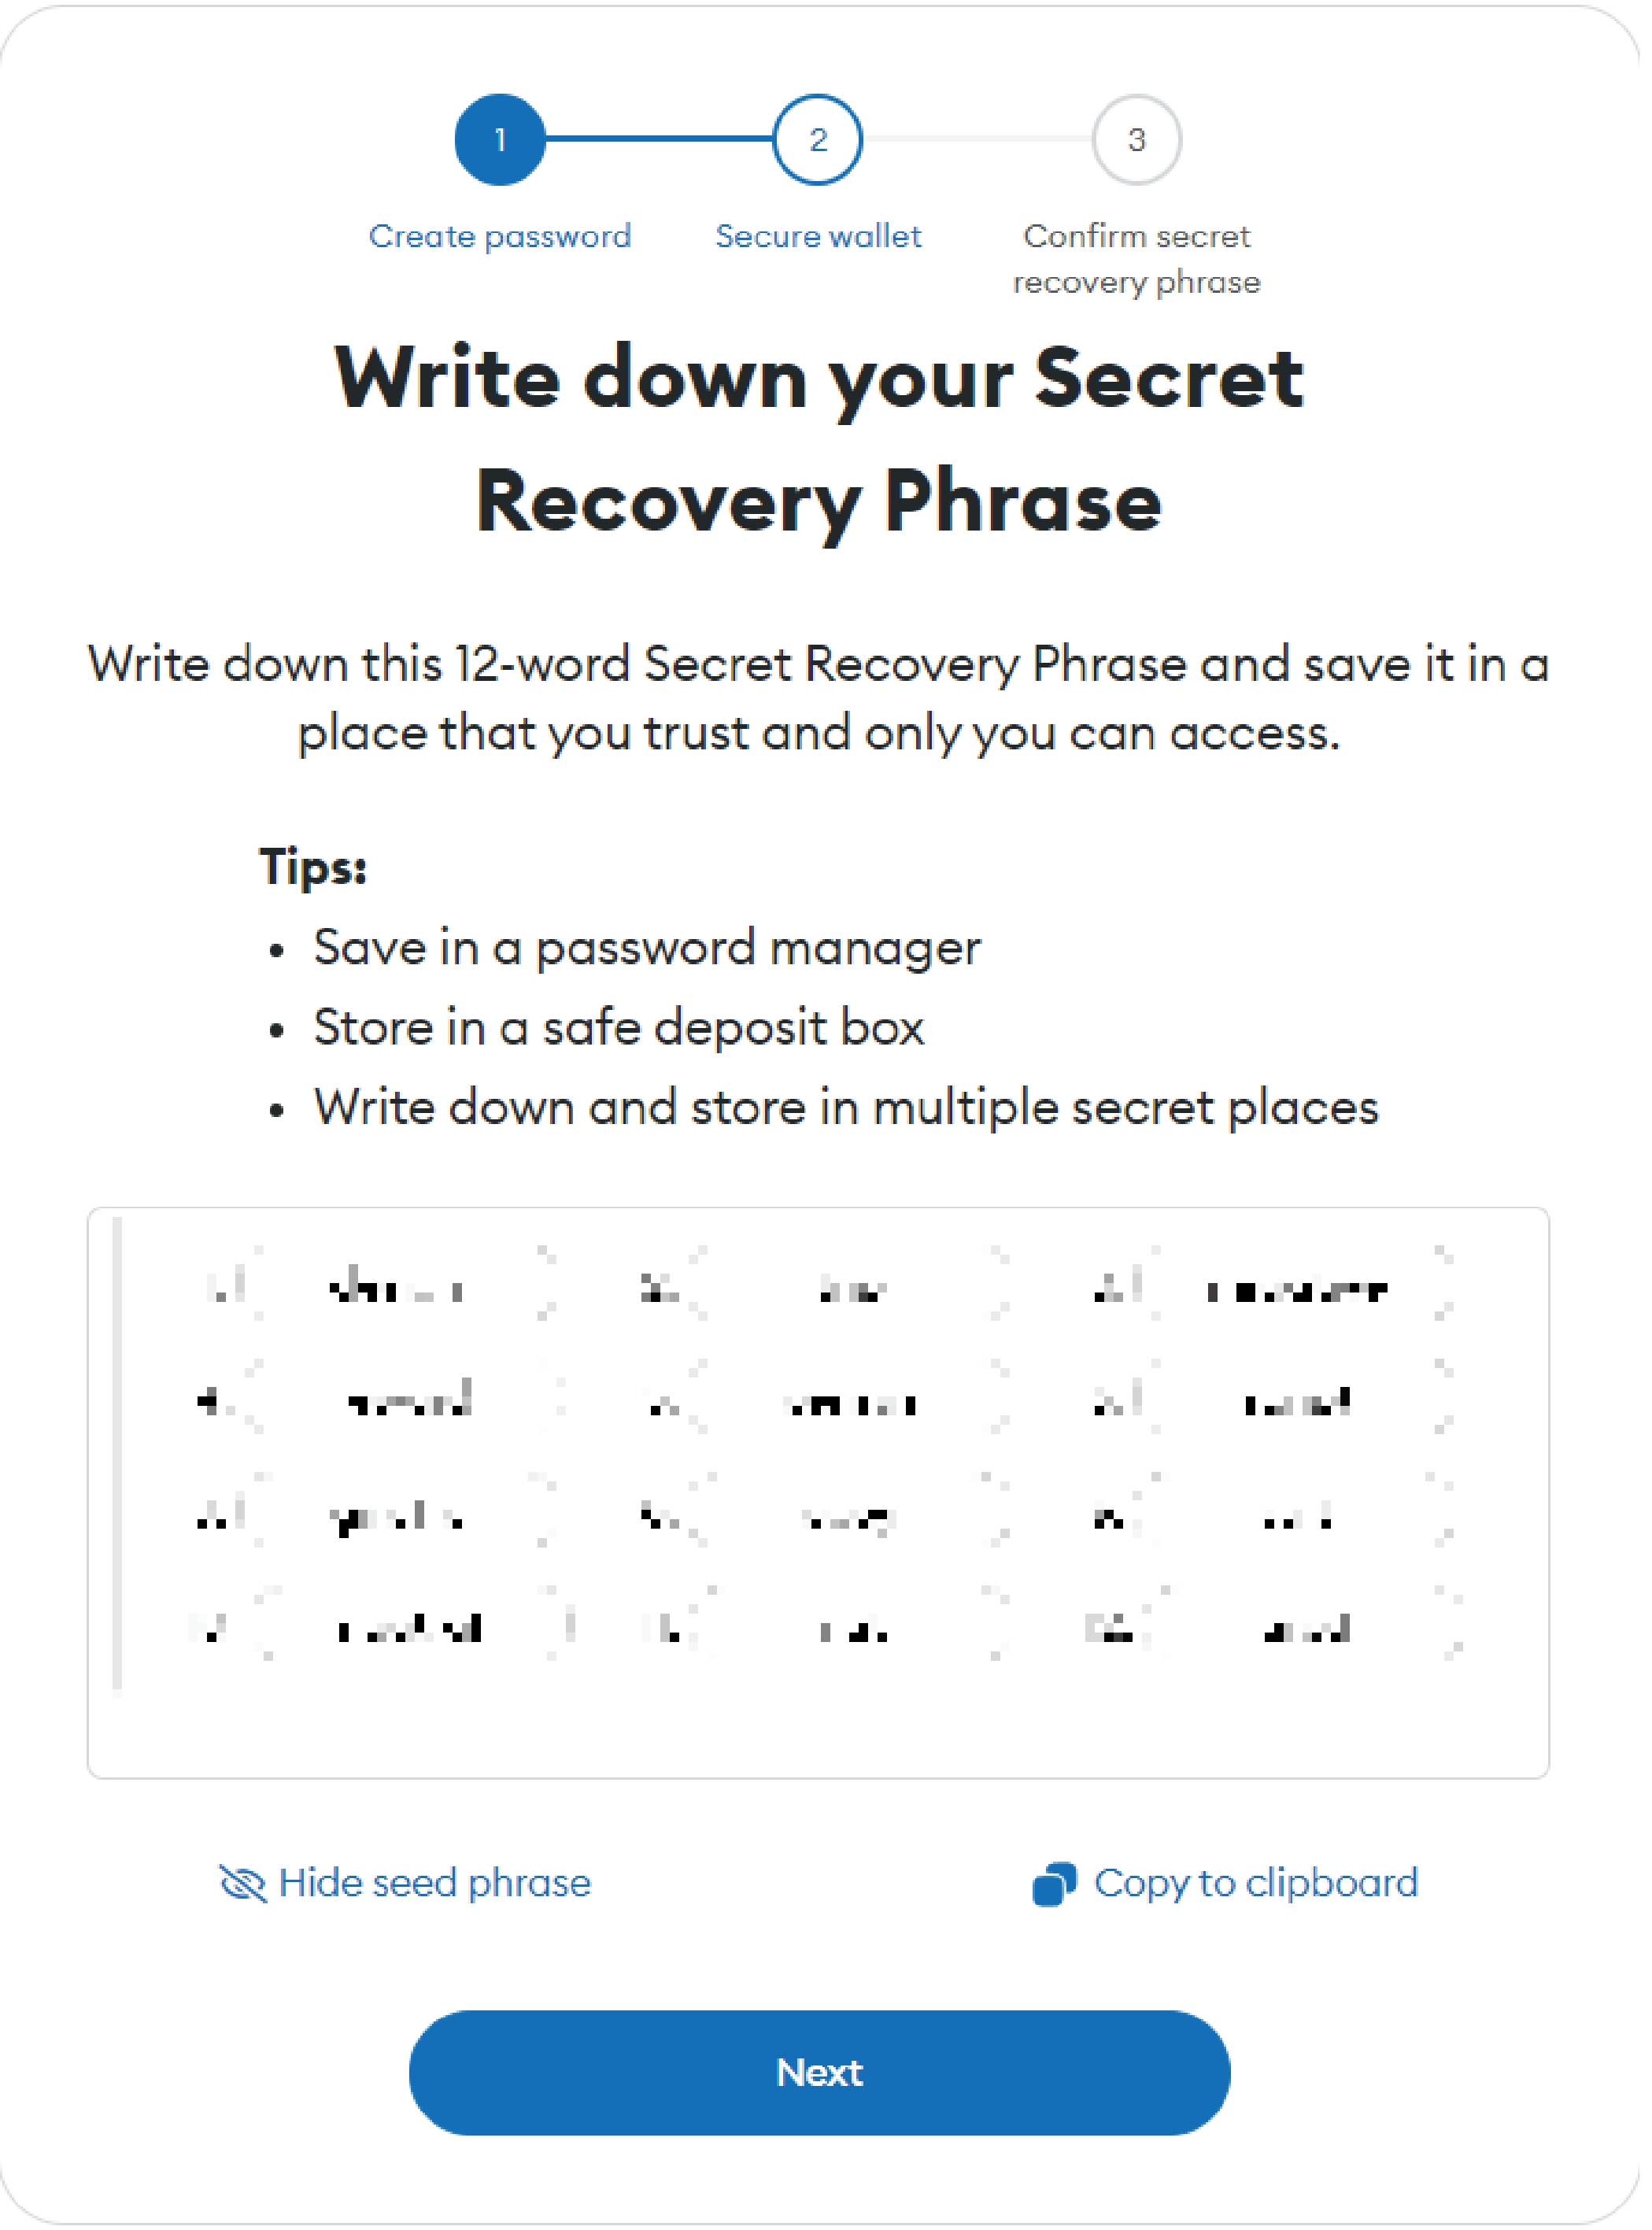
After viewing the video about Secret Recovery Phrase, your Secret Recovery Phrase will be displayed. You will see 12 words — copy them to your clipboard and keep them safe so that no third party can see them.
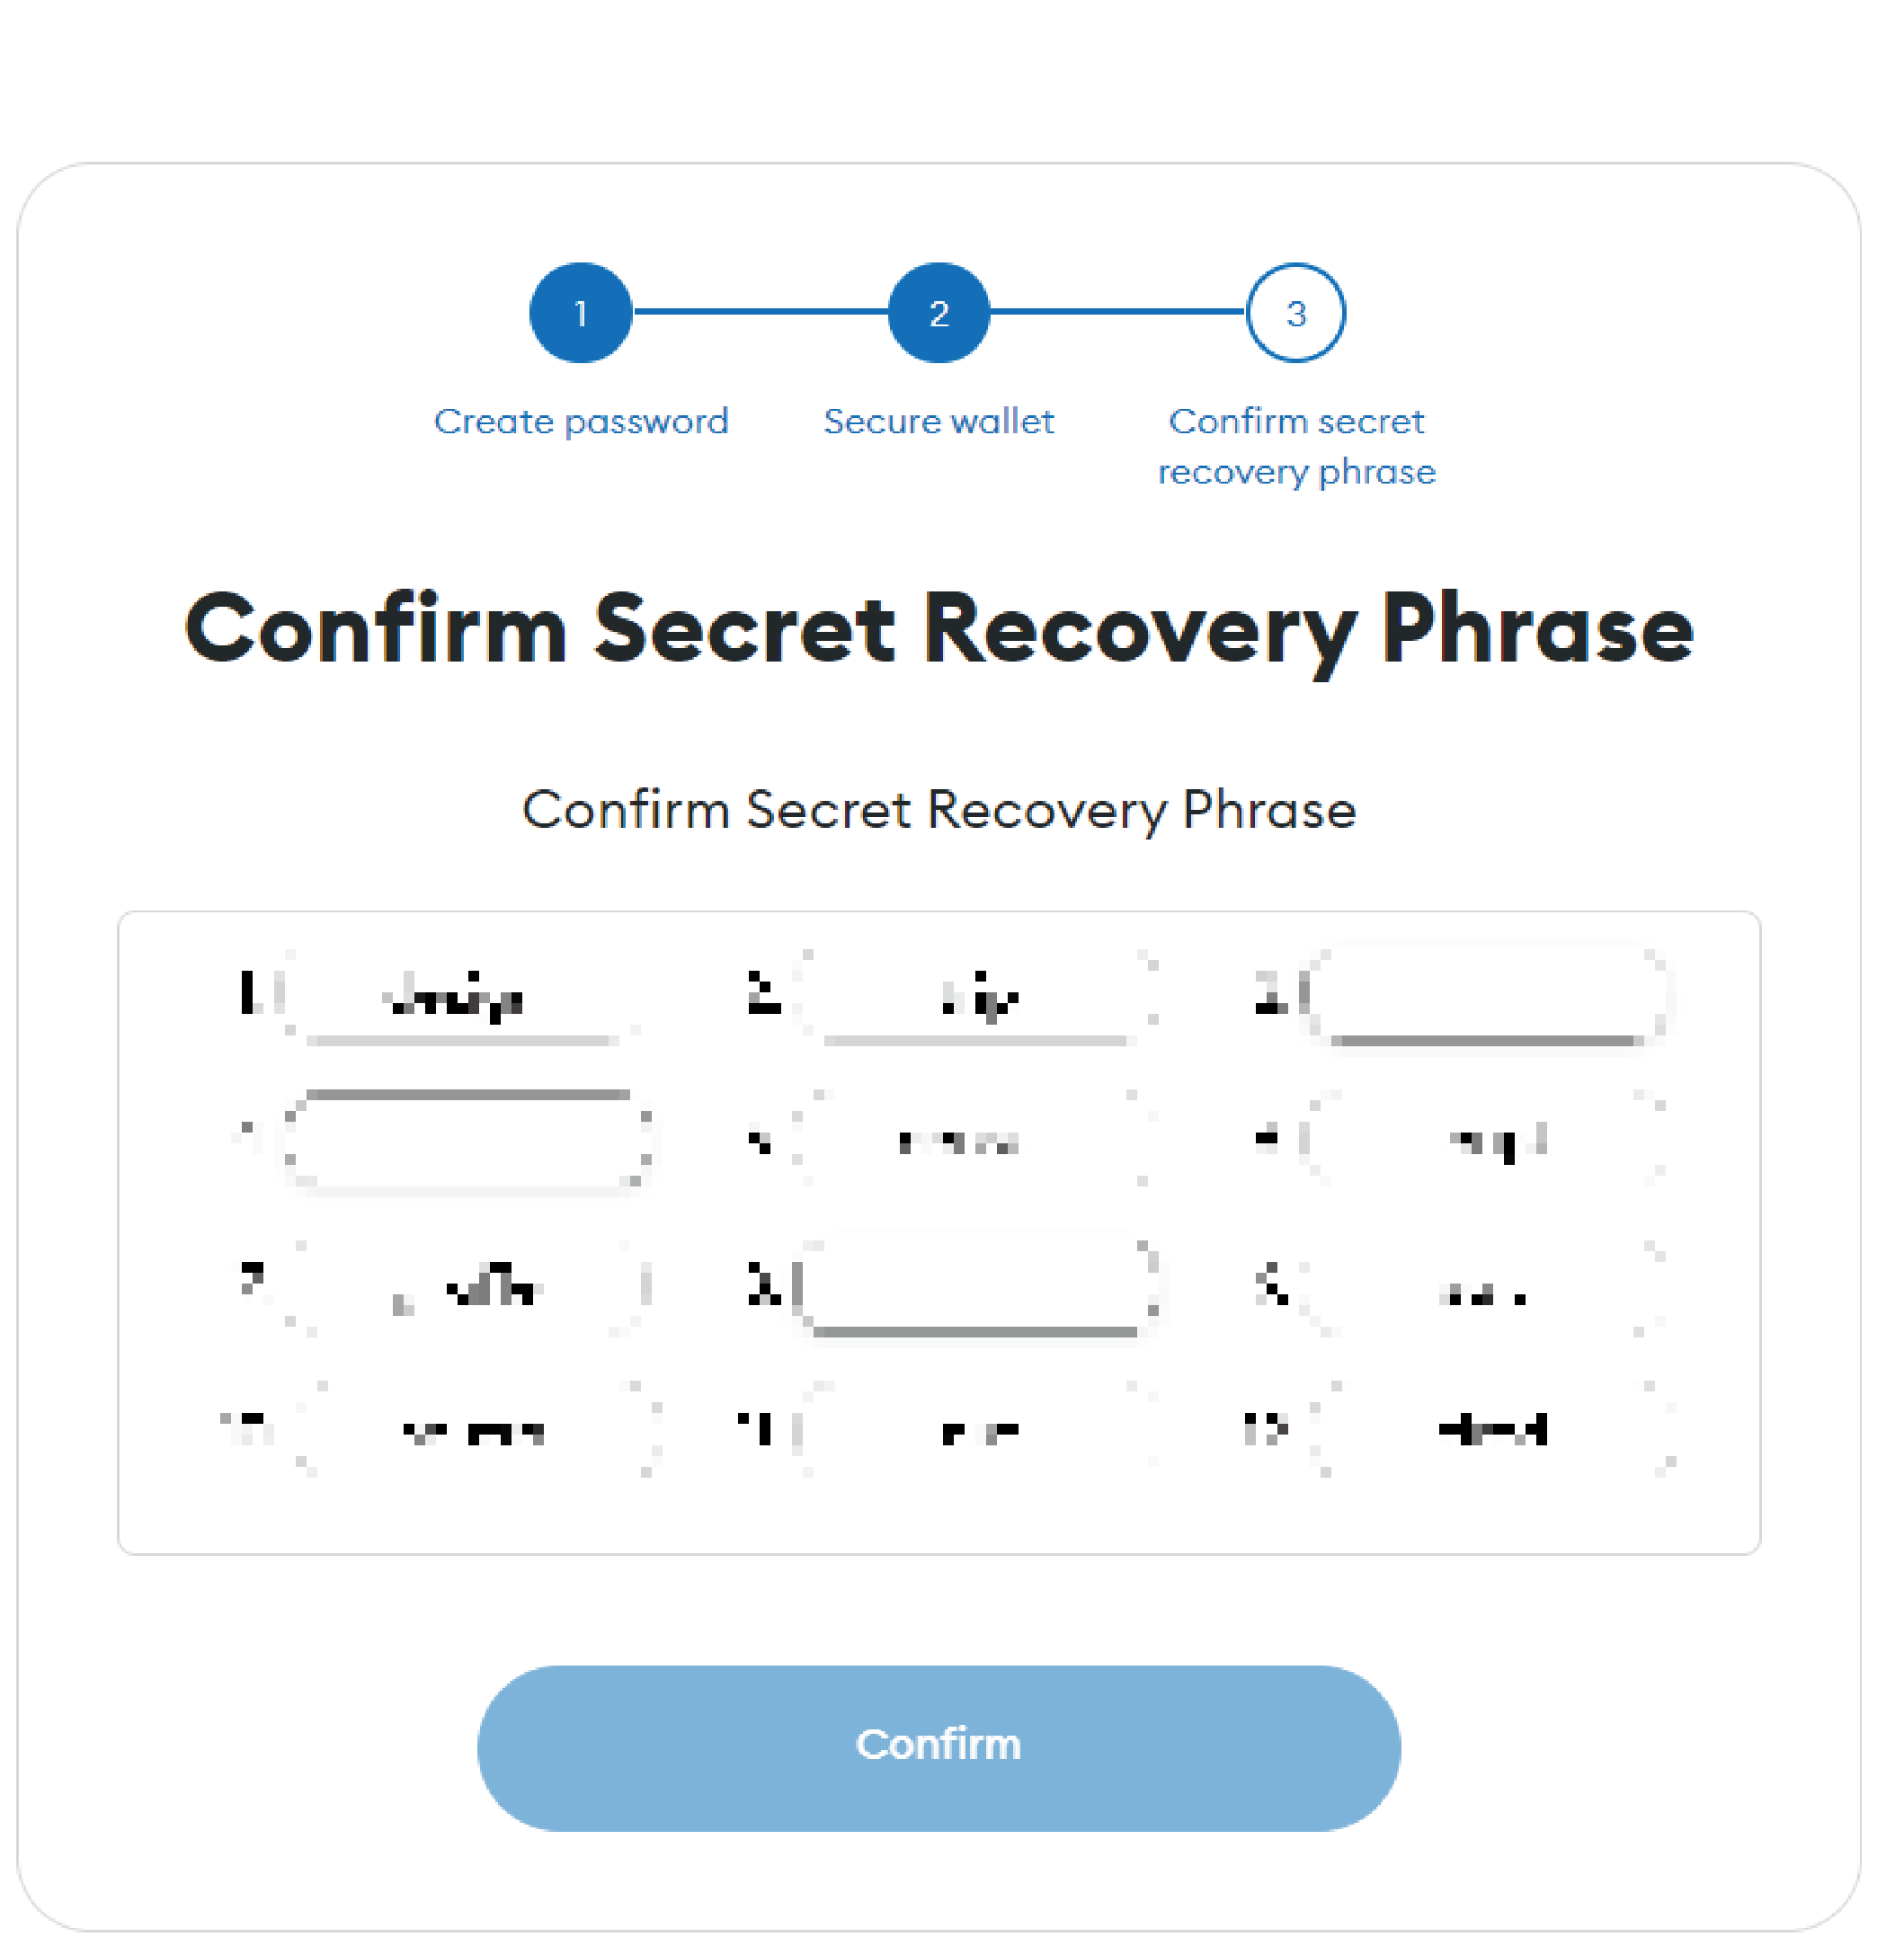
Fill in the blanks using the Secret Recovery Phrase you saved.
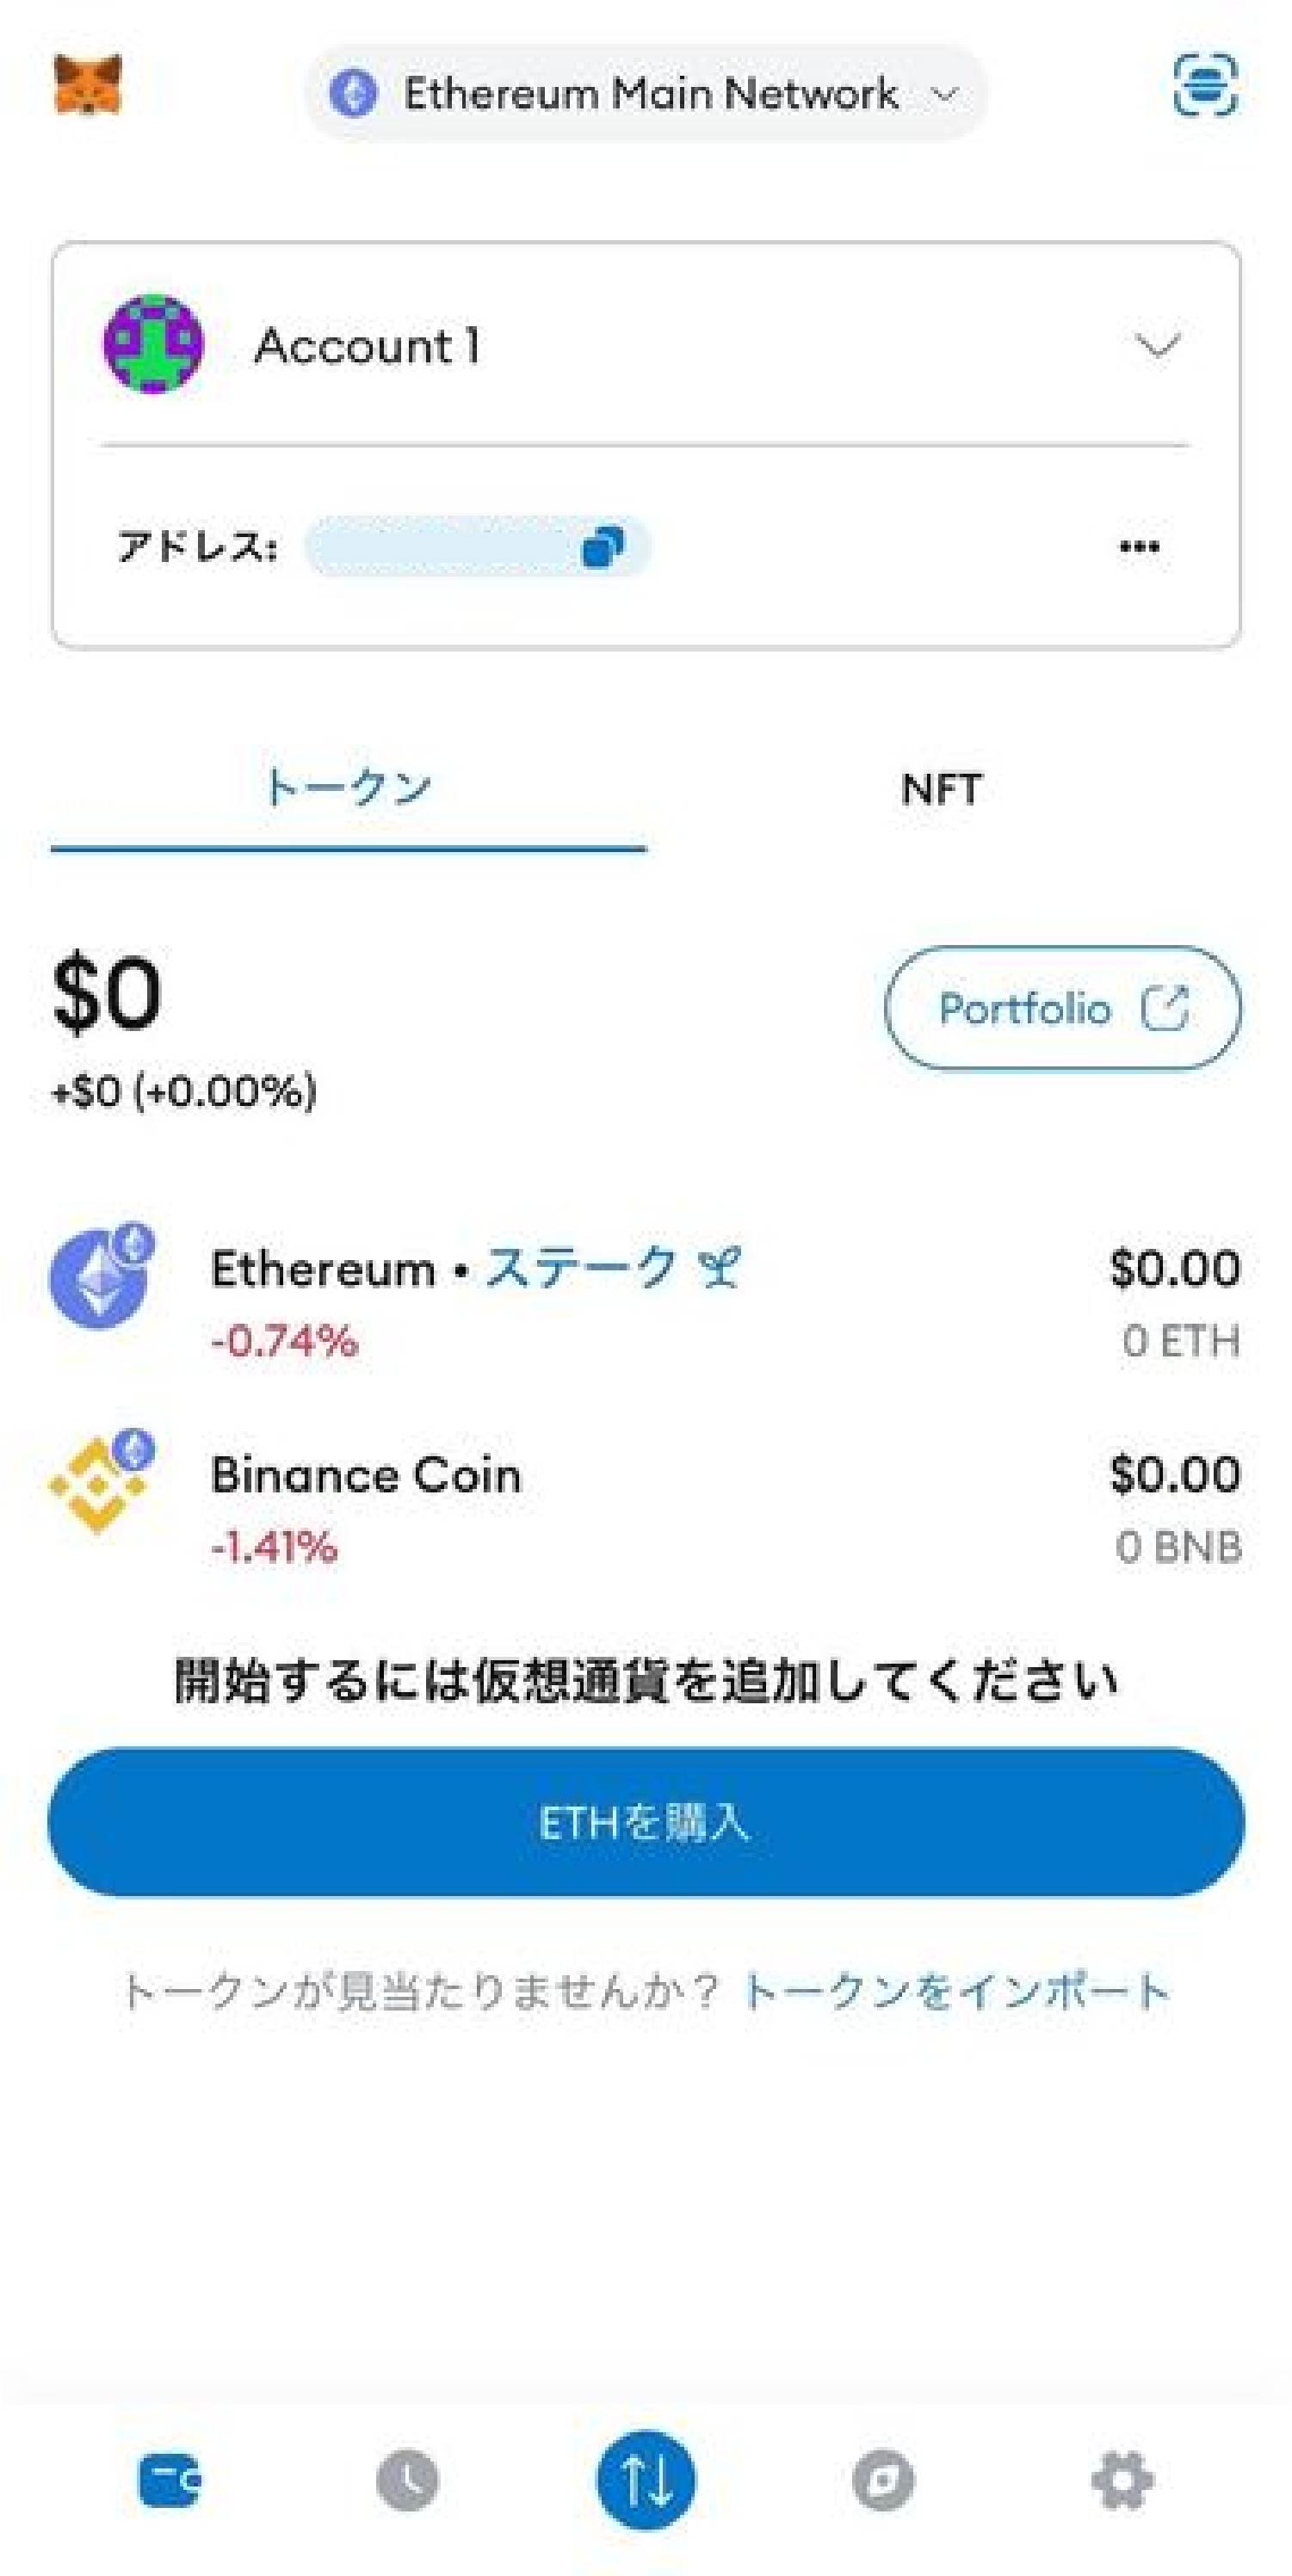
Once you have correctly entered your Secret Recovery Phrase, a wallet will be created. You will see guidance on how to store your Secret Recovery Phrase correctly, so please check the image below.
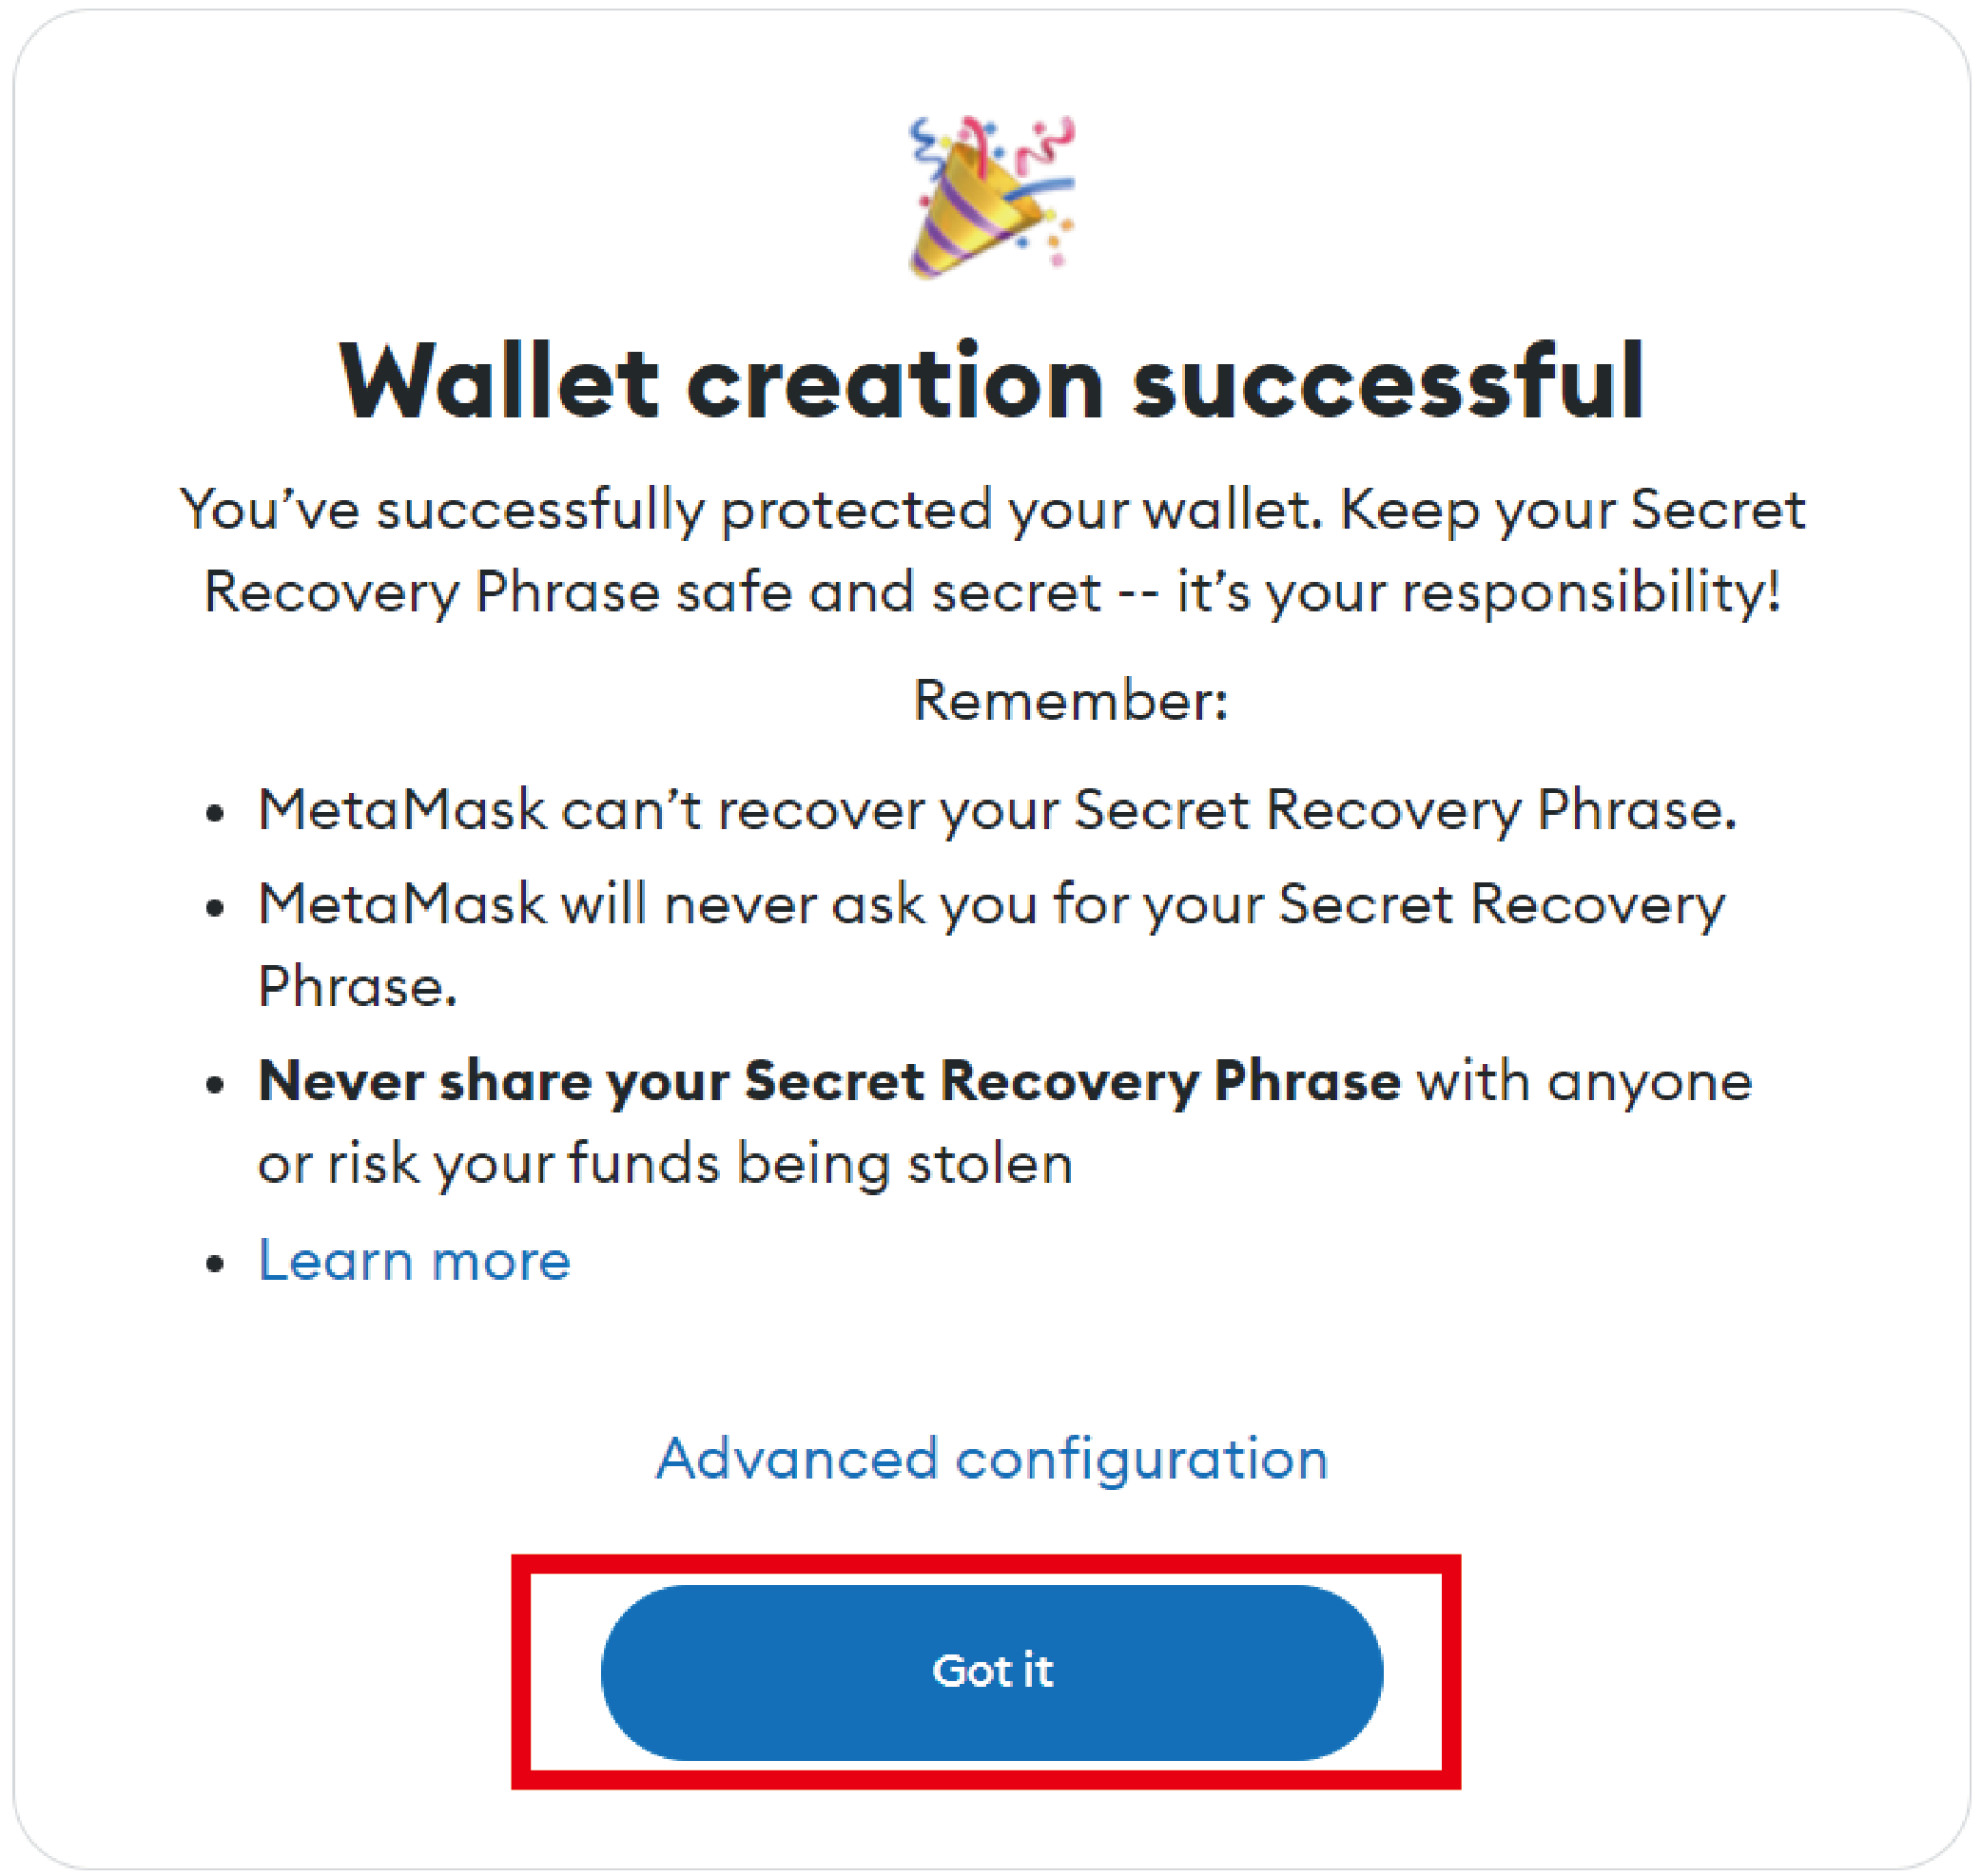
Creation is complete when the screen below is displayed. Click the puzzle icon to see MetaMask when you want to use it.